Thursday, April 24

Cookware for Newlyweds


A friend recently went through my blog to see if I had any reviews of cookware, and sadly, my cupboard in that regard was bare. To make up for this deficit, I'd like to add a few thoughts about cookware and how to go about buying it.

Non-Cooking Considerations
I think that all of us who see ourselves as careful chefs would like to say that cooking vessels are purely about optimal function. But, just like food on a plate, the way pots and pans look in the kitchen (since they're not tucked away behind swinging doors with tiny round windows) is important. Picking pots is like picking sneakers, after you've decided on the function, also consider the design. If you hate the way the pot looks, it'll end up at the back of the cabinet.

Sets vs. A La Carte
Sets are great things to put on your registry, but in the end, your pot usage will vary depending on your cooking style. I don't think most sets really give you value over time because you'll end up only using a few pieces consistently.

Form Follows Function
Different sorts of pans do different things well. For example, for braising, you might want to get a Le Creuset dutch oven. Cast iron is ideal for slow cooking and even heat. Le Creuset are well made, last for years, and they're easy to maintain and easy on the eyes thanks to their enamel coatings.

Stainless
For searing, making sauces, and sauteing, you probably want stainless (like all clad). It's non-reactive with acids (like naked aluminum would be) and very durable. It inevitably gets scratched, so don't buy stainless based on a shiny mirror finish. It will soon be gone with regular use.

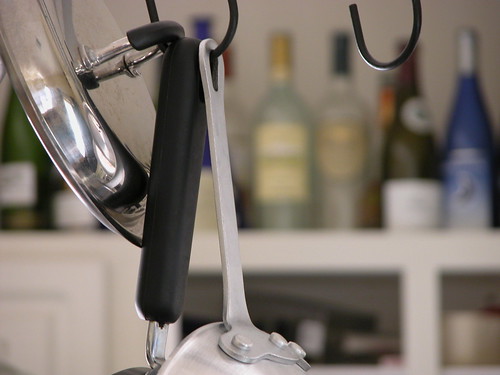
Since stainless gets very hot and will be filled often with heavy ingredients (like steaks), be sure the handle is easy to manage and comfortable. Any decent pan will have a handle that stays cool. Cheaply made pans have spot-welded handles (you can see the small dimples at the base of the handle) whereas well made pans are riveted.

Another hallmark of a well made pan is a layered base construction. Stainless steel, a metal great for cleanup and durability, is unfortunately a pretty poor heat conductor. That's why fancier pans add layers of aluminum and copper to the inside of their bases to compensate. Some of the pans seems to go overboard with a zillion layers, but it's not all just hokum either. Nothing spreads heat more evenly than copper, which is why many add copper to the mix. If you're going to use an induction cooktop (where an electric field heats up the metal instead of flame), you need to have ferrous metal somewhere in the mix. Pans will be marked whether they're for use on induction cooktops or not.

Non Sticks
I would never advocate getting only non-sticks because they don't develop caramelization as well as bare metal, but they're great for delicate foods like eggs that stick. There are new generations of non-stick that that can stand up to metal utensils and being washed in the dishwasher. The key to non-sticks is not to overheat them: the coating breaks down and throws off hazardous gasses when heated to temperatures over 500 degrees, so don't leave them on the heat without food in them or use them in the oven.

Sunday, April 20

The Most Useful Gadget in the Drawer-Simplicity!

photo credit to Silver Bromide on FlickrFor a long time, I've been trying to zen-ify my kitchen tool drawer. A few years ago, I got caught up in specialized doo-dads. One thing to squeeze lemons, another to squeeze limes, and yet something else to peel them. Now I've gotten my drawer down to 7 essential items (not including a few must-have knives) and here they are:

1. A pastry knife/cutter/scraper (I have one that's flexible plastic). This thing works wonders for chunking off bread dough, pasta dough, and scraping batter from the bowl. You could cut bread or pasta dough with a knife, but that's exactly why you need this tool!

2. The medium-small Microplane grater. This works for nutmeg, cheese, and zesting lemons. It's sharp, easy to clean, and you don't need a million different ones. I even use it for pulverizing onions and tomatoes for paella. Don't use it on ginger, though, it cuts the fibers. Instead, just cut up chunks of ginger and pulverize with the back of a wooden spoon and strain with...

3. A medium strainer. This thing is for straining pastry cream, soups and gravies, pulping soft ingredients like ripe tomatoes and banana, or in a pinch you can even make tea with it!

4. A quick read thermometer. I found I need it less as I get more experience cooking meat, but it's a great learning tool, and it can answer any doubts you have over the chicken you just pulled out of the oven or off the grill.

5. Kitchen shears. Get the kind you can take apart and wash, that way you can cut chives one minute and take apart a chicken the next, throw into hot suds or the dishwasher, and then go back for more. (After chicken, I would make sure you wash carefully though, maybe even add a little bleach to the wash water, before using on chives again...just to be safe).

6. A wine tool...enough said. I give myself a freebie on this one, since there's really no substitute. I like is this one. It also doubles as bottle opener for old skool beer or mineral water.

...and since 6 didn't really count as a gadget...

6. A kitchen scale. I've got an inexpensive one that does ounces and grams. It's essential for baking, though unfortunately doesn't get used very often.

7. Measuring spoon set. Sort of counts as a gadget, I guess.

So what do I do about those lemons or limes that need to be squeezed? I roll the citrus under my palm on a counter top using pressure to loosen up the fruit, then slice in half, stick a fork in the pulp and squeeze. Move the fork around a bit to get even more juice.

One final note on gadgets, here is the most egregiously superfluous gadget of all time...behold this misguided, inelegant waste of resources.

Thursday, April 17

The Perfect Pantry 2: Olive Oil

photo credit goes to ShellyAlmost all recipes call for fat. The important question isn't how much, but which one to choose from? In a well stocked pantry, having a variety of fats on hand is not only necessary, but also fun from a flavor standpoint. There are so many varieties to choose from, you could dress a salad or fry some calamari a dozen ways just by switching the oils.

Oils you'd Eat Out of the Bottle
There are a few oils that you'll want hanging around just to add zazz. Olive oil is the obvious one, but peanut oil, mustard seed oil, grape seed oil, and walnut oil all bring varying levels of complexity and flavor to your food. There also oils whose sole purpose in life is to deliver some other ingredient, like garlic infused olive oil or truffle oil.

Olive Oil
The well-stocked pantry has at minimum a high quality "eating" olive oil for fragrance, floral or spicy notes, and velvety roundness for greens, dipping bread into, or putting the finishing touch on everything from fish to flatbread. Like any crave-able food, there are hundreds of nuanced choices ranging from reasonable to ridiculous in terms of price. 

Exploring olive oil can get as narrow as you like, from comparing varietals and harvest years, to as broad as blended brands you can always rely on. For all eating oils, however, stick with extra virgin. It's the yield of the first press, and it has the most flavor. Subsequent pressings employ tricks to get more oil, but the flavor is either already gone or destroyed (for example, from heat) in the process.

California Oils
My choice for a mid-priced, always-on-hand oil is a local (Bay Area) grower called Bariani. They've got a great, unfiltered extra virgin that's a solid, full bodied all-around choice. I don't use this oil for cooking because heat destroys it's complexity, but I'll splash it on almost anything.

When I want to go a bit more upscale, I like Seckinger Arbequina. Arbequina olives are small, brown fruits mainly produced in Spain that produce a uniquely rich and peppery, delicious oil. Becky Seckinger is a fourth generation producer who makes small batch, organic oils that can handle center stage in any dish. She's got a bunch of varietals in addition to arbequina.

Storing Olive Oil
The key to experimenting with oil to try one at a time (in addition to your 'house' oil) since it ages quickly and dies once it's exposed to oxygen. So, in addition to only keeping small quantities on hand, it's best to keep all of your oils, no matter what you choose, in the fridge, not in the cupboard.

Next time, varietals, odd ball, and frying oils.

Photo credit goes to Shelley, who's got a Slow Food blog. Check it out here: http://lfnn.blogspot.com/

Tuesday, April 15

The Well Stocked Kitchen: Start with Salt & Pepper

credit goes to gothick_matt on Flickr
Salt
Alice Waters councels that one thing all cooks can do to immediately improve the taste of their food is replace the iodized salt with pure, unadulterated mineral. Alice's palette is a bit more developed and naturally acute than most of ours, but I'm fully on board with this tip. Replace your morton's iodized with kosher, already! If you're taking a multi-vite or eating kale, you're already getting more than enough iodine. Taste different salts next to each other...iodized salt definitely has a chemical note.

There's been a lot of press about varietal salt: black salt, sel de mer, large crystal, and Himalayan. These varieties are really fun to play with, but they're not essential. If you're intrigued, by all means buy some upscale salt and play around. If you're keeping it simple, buy yourself a big box of kosher salt, and well, salt it away. It's part of your well-stocked pantry.

Pepper
Pepper is as complex as coffee, and many of the same rules about quality apply: good pepper has more complexity, it only grows well in particular parts of the world, it does not age well once ground up, and the good stuff does tend to cost a bit more.

Fortunately, it's easy to find great pepper. Penzey's has a great selection. High quality pepper comes mainly from the east coast of India. Two of the most celebrated varieties are the Tellicherry and Malabar (in order of celebration). If you've never tried Malabar, give it a shot. It's loud and good, but Tellicherry is fruitier and more complex: perfect for salad, where you can really taste every nuance.

To stock the perfect pantry, consider buying a big bag of peppercorns and a good grinder. For producing nuggety cracked pepper, I like Peugeot's hardened steel burr mechanism: they make a variety of body styles, but I would avoid the acrylic one because they flex a little too much. I have the aluminum "Perfex" style. It's small and simple but works reliably year after year.

You can put the rest of the peppercorns in the freezer and use them as you need them, they'll keep fairly well for a couple of months. Salt never goes bad, it's a mineral after all, as long as you keep it dry in an airtight container.

Part 1 of a Series: The Perfectly Stocked Kitchen

The kitchen is a management project. Pots and pans stack up, the pantry goes bare, refrigerator contents age. One way to get a grip on all of it is to rationalize...what do you really, really need? What things make the pleasure of cooking richer? You need a plan.

The Pantry
In part one, let's talk about the pantry because it's crucial to happiness. The pantry is your savior, your comfort, your magic trick, and your ah-ha inspiration. If you don't have an actual pantry, that's ok. The pantry is an idea, not a physical space. Anything you've got that's a base ingredient of more than one finished product, things that polish up or finish dishes, or things provide the foundation for meals like pastas or rice are part of your pantry no matter where they're kept. (If you've got a physical pantry, that's a plus because you can scan it's contents just by turning your head instead of rifling through cabinets, like in my house).

Getting the Obvious Out of the Shopping List
At the very least, pantries ought to have staples like flour, rice, and sugar. But they also need to have flexible components you can put into other things like canned tomatoes, dried beans, and a few blue ribbon items like olive-oil poached garlic, truffle oil, and Tabasco.

Over the next few weeks, I'll be doing an occasional look at what should be in your pantry to make your life easier, your cooking more enjoyable, and keep budget and sanity in check.

Next up: seasonings to keep on hand.

Sunday, April 13

A Review of the Breville Ikon Removable Plate Grill

There aren't many, but one special purpose appliance I do like (in theory alone at this point) is the removable plate grill/griddle/panini press.

Before all you purists roll your eyes, consider that in addition to making paninis, you can come home from work late and cook fresh chicken breasts and pile of asparagus and be done in 10 minutes flat..with carmelization! Then just throw the removable plates into the sink or dishwasher and you're ready to settle down to a reasonable dinner. The lid of the press not only cuts cooking time down significantly by applying two cooking surfaces, it also shields spatter and cuts down the mess.

Admittedly, cooking this way is not how I like to on saturday afternoon. But on work nights, it makes things a lot easier. Or did, I should say. After wearing out my Cuisinart model grill and panini press, I replaced it with an a simpler iron plate that goes right on top of the stove burner. If I want paninis, I just heat up a cast iron skillet and put it, bottom down, right onto the sandwich.

I'm still open to the right electric grill/panini press with removable plates, but the perfect appliance doesn't exist yet, as far as I can tell.

The Removable Plates
Most removable plate grills have interchangeable cooking surfaces that fit onto their heating elements so you can convert them into griddles. Some even let you open them up completely so both cooking surfaces are flat, doubling the total cooking area. If you've got a big brunch party, this can be extra helpful when all burners are occupied.

Most panini presses/grill cooking plates are made with some sort of non-stick coating. When the plates are removable, you can simple wash them like you would any non-stick, and move on with your life. If the plates don't come out, get ready for serious wiping. If there's any type of fat rendering involved, life just gets messier and requires more wiping. Really, if the plates aren't removable, plan for mainly panini pressing or griddling pancakes.

Comparing Removable Plate Grills
George Foreman grills exploded the market for electric nonstick two-sided cooking, but along with dubious health claims about draining away all kinds of fat (who would really want that??) they're made with quite a bit of plastic and generally suck in the looks department.

The Cuisinart Gourmet Griddler removable plate panini press/grill (around $100) has a metal body, but it's quality isn't great either, especially around the controls. The knobs have silver foil on them to make them look like metal (nice try guys) and inexplicably have two knobs that do the exact same thing, adjust the temperature.

These flaws are fairly minor and easy to overlook, but what's not is the awkward fat drains that require you to position oddly shaped cups under a spout ever time you use it, and the fact that the teflon on the removable plates didn't stand the test of time. After just a few months of regular use, they lost their nonstick properties and began to flake. I wouldn't buy another one.

The Breville Ikon Removable Plate Grill's Daddy
The Breville Ikon removable plate grill is based on an existing model, a larger grill/griddle/panini press. The larger model is perfect for pancakes and panini, but not really for "grilling" because you can't remove the plates to clean them.

On the positive side, the larger model has a brilliantly smart, built-in fat drippings tray that's designed as a simple, easy to handle drawer. It also has a very functional, cunning hinge that enables the cooking surfaces to open out flat or lock partially open in a number of upright positions, providing a huge range of options. It even has a tilt mechanism that lets you slope the cooking surface to encourage fat or liquids to drain off, or un-tilt to griddle pancakes flat.

The quality of this thing is indisputable. It's a heavy, really well-made appliance with solid controls, industrial switches, and evenly distributed heat. It warms up quickly and powerfully, and has a lot of nice touches like built in cord storage and a brushed steel surface that's easy to clean.

Unfortunately, the plates don't come out (really, its biggest drawback) and the permanent cooking surfaces are one grill and one griddle. If you use either one for fatty, messy foods you're stuck cleaning with sponges and rags because you can't run this large appliance under the tap. The second significant bummer is that you can't simply switch off the lid heating element, so when you're using it for pancakes only, the top part heats wastefully.

If Breville were to redesign this thing with removable, interchangeable cooking plates and a three position switch (turn on lower surface, turn on both upper and lower surfaces, and everything off) this appliance would be nearly perfect.

The Skinny on Breville's New, Skinny Offering
I was excited when Breville, a brand that makes a very nicely designed home coffee burr grinder and water boiler as well as the grill/press I described, came out with a mid-size removable plate grill. It costs around $150 if you shop around.

Overall, compared with the quality of its predecessor, the new model is pretty disappointing. They kept the integrated fat drain/drawer idea (which is good in theory) but on this model it's small, fills quickly, and it's awkward to pull out when it's full of drippings. Even more maddening, the drawer has a metallic strip (purely for looks) glued onto the outside which gets very hot. So you have to wait for everything to cool off before you can handle it. If they had left off the strip, that would not be a problem.

The metal body feels much more cheaply made than other Breville appliances, and it lacks the 180 degree hinge, so you don't gain a larger griddle surface. It comes with one "bonus" griddle surface to replace one of the grills, but it really should come with two (as well as open out completely). That's disappointing, too, and very unclear in the marketing language I've seen for this thing.

Overall, it doesn't feel well made enough to be a Breville, or well enough to justify the price for it's size and features. Sadly, I must give this appliance a B--. I'm rooting for Breville to rethink and retool this design to be a little smarter and well made like it's many siblings.

Friday, April 11

Sous Vide, & Why You Don't Need to Try This at Home


Sous vide keeps cropping up on TV shows like Top Chef and Iron Chef as a cooking method. It may seem exotic and new, but in fact it's been around since the 70's.

Sous vide literally means, from the French, "under vacuum". The process, in a nut shell, involves vacuum packing raw food in plastic, then submerging the bags in a circulating, temperature-controlled water bath that brings food to temperature slowly.

Chefs like sous vide because it produces textures and flavor that can't be achieved using direct heat. According to Harold McGee, cooking at low temperature for long periods of time breaks down whatever you're cooking to produce tenderness without the usual side effects of high temperature cooking, most importantly, drying and changes in flavor. Some meats need to be cooked for over 24 hours "sous vide" to achieve this effect.

Low temperatures and long cooking times may seem like a party for germs, but since the ingredients are sealed in plastic under vacuum, aerobic bacteria can't grow. But anaerobic bacteria (botulism bacteria) can. So it's critical to maintain precise temperatures that kill them off.

The high risk of bacterial contamination means sous vide shouldn't be attempted at home without proper vacuum sealing equipment and a professional circulating, heated water bath. Let's face it, how many times do you come home from a hard day of work craving a sous vide foie gras?

Thursday, April 10

An Open Letter to Bon Appetit


Dear Bon Appetit,

You were always the slightly too precious one showing up in my mailbox every month, with your muffin basket aesthetic and heavily sauced prose. But I knew that about you, and I looked past your affectations for ideas. Presentation ideas. Ingredient ideas. I'm happy you want to cast off that tired image, but I think the baby and the bathwater may be traveling as a couple right now. Month after month since you've changed, I've been considering your new you, and so here are my thoughts.

First, a magazine is not a website. Seems like an obvious point. But how else to explain why you've adopted these overbearing teardrop and slash motifs throughout your pages? Unlike a website, where visual cues help you keep the site "tree" in your head, magazines don't have that problem to solve. That's the beauty of magazines. They're not linked: you just keep turning pages, and eventually you'll run out. So I don't need those teardrop tokens like a breadcrumb trail to help me find my way...I already know where I'm going (to the next page).

Second, let's talk about the new look of your pictures. I admit that food photograhy often suffers from being overly shiny, posed and polished, but it should at least pique your imagination if not make you downright hungry. But food photography shouldn't just be food porn, made to be consumed only by the eye. There should be information packed in. Like how to present ingredients elegantly.

I've noticed recently you're trying for more graphic, bolder food styling and photos. But making plates of food into decomposed, two-dimensional color smears isn't working. These types of images may look good when I squint hard at their high contrast, over saturated flatness, but when I look carefully they look like someone vomited on the plate, however artfully. I would never arrange my food that way to present it to people who I expect to eat it. And it doesn't help me the next time I'm trying to plate something.

Finally, I get the sense that your art directors are running amok with Adobe InDesign, which is a powerful tool indeed. Bubble type, helvetica with no leading, and microscopic font sizes may work on high res screens in evenly lit offices, but they don't work in print. Your pages are looking dense, and your layouts are reaching for retro hipness that can only work when irony fills the air like smoke in a Berlin lounge. Food magazines like you, Bon Appetit, can be many things, but ironic doesn't make it to that list.

I know you're experimenting, and I applaud it, but I don't think it's working yet. I'm still loyal, so I'm waiting patiently for you to get over your mid-life crisis.

Yours Truly, Benjamin

Tuesday, April 8

The Sugar Coated Truth

Sugar's reputation may have gone to the nutritional dogs over the last three or four decades, but it doesn't deserve the rap when it comes to baking. It's an essential ingredient not only for the taste, but for the way it impacts texture. If you bake cookies or make pancakes, think carefully before you cut back.


In Baking, Sugar is a Liquid
Sugar mixes with water like lonely dogs in a parking lot, and then it holds on tight as a tick. This hydro-greediness gives cookie dough the lubrication is needs to spread more fully on the baking sheet, and then retain moisture longer in the jar. Leaving sugar out will only give you minor caloric savings (as compared with say, the butter) and  just results in higher, drier disks you won't want to eat at all. According to my crude calculations, cutting sugar in half, using an average cookie recipe, will only save you about 15-20 calories per cookie. Not worth it!


Sugar Versus Protein
Whenever you bake something that's leavened, from cakes to pancakes, you're making good use of wheat proteins to create a sticky mass capable of holding bubbles while it firms into a delicious, cakey matrix.


This stickiness comes from gluten, a protein that only forms when water is around. Since sugar sequesters water, it inhibits some of the protein from forming. That's why pancakes made with no sugar can be bready and tough, while those made with sugar are tender and light.


It also explains why sugar is a preservative: it literally sucks the juice out of germs.

Monday, April 7

The Importance of the Liquor Cabinet


Getting your place together with an eye to entertaining can shake up how you go about it. For example, for years I've scattered liquor and aperatif bottles along with their appropriate (more or less) glassware across various and sundry cabinets, bookshelves, and even a few less dignified spots (i.e., cardboard boxes shoved under the bed). On top of that, I never had the right number of tumblers for all, a fact usually only brought into clear focus when the guests arrived. Now I've got a liquor cabinet.


Welcoming and Organized
Nothing says "hi" more warmly than the words "Can I get you something to drink?" accompanied by a short walk to the liquor cabinet. In addition to establishing a party vibe, it can keep you, the host, more organized. By putting all the libation paraphernalia in one place (alcoholic or not), the drinks and party flow more easily with fewer last minute trips to Crate & Barrel for hi-balls, or the over-priced package store on the corner for Cinzano.


Route the Traffic
In addition to being an invaluable organizing tool, the liquor cabinet in the dining area establishes a beachhead that helps you conquer the greatest foe to party flow: kitchen stickiness. Instead of congregating around your cutting board, guests will naturally migrate to the rest of the floor plan--a key to your sanity as you get the meal or appetizers together.


The Style Angle
If you follow the philosophy, as I do, to never let an opportunity for accessorizing go untapped, you need a liquor cabinet. It's the perfect spot to express your inner ring-a-ding-dinger, so go ahead and get an ice bucket, a silvery tray, and maybe even some quirky red tag sale glassware. No one judges the liquor cabinet accessories.


Basics
A well stocked liquor cabinet doesn't need to cost a bundle, or require 20 bottles with exotic varieties. Here's a list of basics that will cover almost every one's taste and budget.
1. Get yourself an inexpensive vodka. Most people will not be able to tell the difference when mixed. If you're sensitive about leaving plastic bottles lying around, decant.
2. A reasonably good gin. Unlike vodka, you can really tell the difference. I like Tanquerey and Bombay Saphire for their quality and relatively reasonable price. There are better gins, but you won't be sorry, either.
3. You need some whiskey. There are some great bourbons such as Evan Williams Single Barrel, but I always keep Knob Creek on hand. It's solid, tried and true...and frankly, not that many people drink it straight so you only need a small bottle to start. If you get into it, there's a whole world of bourbon to explore.
4. Sippin' Tequila...get a good one.
5. Margarita Tequila like Cuervo. When it's mixed with all of the citrus and sugar and salt, there's so much going on that the tequila won't play a leading role.
6. Some silver rum for Mojitos.
7. You also need a few condiments: Angustura bitters for whiskey drinks, triple sec for sprinkling on berries and putting in Margaritas, and some white vermouth for martinis and pan sauces (yum).
8. You also need some basic equipment: a cocktail shaker, a few tumblers, and a shot glass for measuring. Pretty much everything else can be improvised.

Saturday, April 5

Sweet Lime, As Seen in Darjeeling Limited


I was curious and surprised to find a new citrus in my local produce store: sweet lime. Another variation on the citrus theme, sweet lime is a juicy, sweet rather than acidic fruit reminiscent in flavor of grapefruit and mandarin oranges.

In the film Darjeeling Limited, sweet lime was served as a refresher to passengers settling into their cars. I did some checking around (i.e. Wikipedia) and learned that India is one of the largest producers of sweet lime in the world, where it's both consumed for fun and medicinal purposes.

I've never personally had any sweet lime juice there, but a survey of websites suggest that it's mixed with some honey or sugar similar to lemonade for serving. If anyone has had this drink in India, where it's called mousabi (musabi / mosabi), please comment and let it be known how it's typically prepared.

Turning Sweet Lime into a Cocktail
Never one to stand on tradition when it comes to mixology, I juiced a few sweet limes and tried them in traditional citrus cocktails. If you come a across some sweet limes, try substituting some or all of the lemon or lime juice in your favorite recipe with sweet lime. You'll need about one third of the total sugar than when using lemons, and it delivers an interesting, subtle twist.

I'm a gin person, so I tried came up with this recipe. Try it for yourself and see what you think!

The Sweet Lime Limited
2 ounces of gin
3 ounces sweet lime juice
2 Basil Leaves
1 ounce simple syrup (a.k.a. sugar water, a tablespoon of sugar or more to taste dissolved in a little warm water will do if you don't have simple syrup handy)
Pinch of salt
Splash of Soda Water

Combine and serve over ice in an chilled tumbler.

For some additional comment and photos, check these out from reader Dave Johnson.