Thursday, December 18
Unboxing: Gifty Cowgirl Chocolates from Moscow Idaho
What I Got In the mail, I got a Cowgirl Signature 1/4 Pound Truffle Box, which costs $12.95 for 8 individually, mylar-wrapped flavored chocolate truffles and one caramel in a heftily built gift box.
What's Inside As you can sorta see from the pics, it's a nice looking gift with lots of decorative stuff on it. There's a sticker, tissue, a ribbon, a tag, and a western-themed, and a silver plastic star button (that unfortnately will go straight from the box into the landfill).
When you open the western-themed gift, what you get is handful of mylar wrapped truffles. Each tuffle is color coded, and there's a variety of flavored truffles to discover, everything from Ivory Orange to Habanero Dark Chocolate flavors in the box.
Gift Impact
I'm a big fan of simplicity, and I avoid buying anything with over-built, themed wrappings, trinkets and decorations all over it. The decade of the Hummer and Escalade is over. Even in gift giving, I like to follow a path of thoughtful simplicity.
Especially in these times when we're thinking a bit greener, I appreciate innovative ways to cut back on packaging rather than ways to bulk it up. Don't get me wrong, nothing was cheezy about the Cowgirl packaging (except the silver button), but IMHO there was just too darn much of it.
For example, I would rather have had the flavor guide stamped onto the inside of the box top with a plain old, low-rez rubber stamper than have another bit of paper to throw away. I would rather have had received the truffles all naked nested in recylced paper than individually wrapped with more plastic I can't re-use. The ribbon was totally cool, however, and I'm already re-using it as a cat toy.
The Chocolates Themselves
For the sake of full disclosure, I tend to be pretty much a purist when it comes to chocolate, but I also love chocolate and chili flavors together, so I was excited about the Dark Chocolate Habanero flavor. To be fair, I usually buy bars, and I gravitate to high cocoa levels and never crave milk chocolates (or worse, white chocolate...if I want to eat pure fat, I'd rather dip bread in olive oil or eat crispy duck skin than eat vanilla flavored, sweetened palm oil emulsions).
However, for the sake of a balanced tasting, I chose both the hottest, darkest truffle for my own personal pleasure, and the lightest, blandest one on behalf of those who enjoy a milder treat.
The Habanero
The ingredient list for all of the chocolates reads well indeed. There's nothing artificial there, just good, solid flavorings. The Habanero truffle itself was not very spicy hot, it was imbued with a pleasant warmth to accompany the bitter and sweet flavors of the dark chocolate. The heat component was a simple, one note shot of capsacin without a lot of chili character. The dark chocolate wasn't bad, either, but it also lacked noticeable character or depth.
The Ivory Orange
For the lighter side, I chose the Ivory Orange tuffle. It had a soft, creamsicle style with lots of sweetness and orange essence floating around. Again, it was a solid truffle, but it was a pretty simple bite. Nothing much to savor, there. It was milk chocolate and white chocolate in a marbled presentation.
The Verdict
These gift boxes are made with earnest care, the wrappings are colorful, and the theme is all americana. The chocolate itself is tempered beautifully and makes that "expensive" impact that many people enjoy. If you know someone who likes themed gifts with visual appeal and a little story and theme to accompany, you'll love giving these treats.
If you're looking for something with a more sophisticated, leaner presentation and an emphasis on adventurous flavor and ingredients, you're better off with Pierre Marcolini or traditional, old-world styles like Teuscher.
Wednesday, December 3
Mean Pinto Beans with Bacon and Arugula
Thing is, beans taste like dirt unless you season and add some meaty flavor. To get going, I use the smartest invention since windmills and solar panels, the pressure cooker, to turn dried beans into a versatile base ingredient in just about 20-25 minutes.
Start with Flavorful Beans
I start with 3 cups of Rancho Gordo pinto beans, 7 cups of suitably salted water, a couple of bay leaves, some cumin, a tablespoon of dried Turkish oregano, a couple of Szechuan pepper pods and several grinds of black pepper.
The basic recipe for dried beans calls for soaking overnight, draining, then cooking in water or stock. If you use a pressure cooker, as I recommend, follow the manufacturer's instructions. My 15-year old Fagor Rapida requires just 20-25 minutes to get the beans to al dente, destroy the gastric problem-causing sugars, and infuse initial flavors into the bean.
Believe it or not, pressure cooking puts dried beans into the category of practical and realistic for weekday meals. If you do it the traditional way, you'll need hours. Pressure cookers are the bomb! In the good way!! All of the current models are PERFECTLY SAFE. Mine is 15 years old and safe as houses...errr...as houses were before the economy did it's swan dive.
Finish the Beans
Once the beans are seasoned and al dente, drain off the cooking liquid and reserve it, then reboot your tongue and think about how to finish them. Today, I sauteed a couple of chopped onions and 4 strips of Niman Ranch smoked bacon chopped into one quarter inch pieces with salt and pepper.
After adding two tablespoons of dried, ground ancho chili to the beans, the somewhat browned and caramelized contents of my saute pan, two handfuls of baby arugula, and a couple of cups of the reserved cooking liquid, I set the pot on low and let the arugula wilt and the ancho to thicken, about 10 minutes.
That's it! And it only cost 10 bucks for 6 servings...not bad. Add some rice or even just a few slices of good bread and you're done.
Recipe
3 cups of dried pinto beans, cooked and seasoned with salt, cumin, oregano, hot pepper pods and ground black pepper. Yields about 6 cups of cooked beans.
2 medium onions chopped and sauteed in 1 tbs of peanut oil
2 tbs of dried, ground ancho chili
4 thick cut smoked bacon strips, chopped into pieces
2-3 handfuls of baby arugula
Season and cook the pintos, saute the onions with the bacon, combine with ancho chili, arugula and a couple of cups of cooking liquid... simmer until the ancho thickens and the arugula wilts and ladle over rice or serve with a couple of slices of good bread.
Sunday, November 9
Pick-Me-Up Before You Go-Go Granola
Premium store-bought granolas like 18 Rabbits incorporate interesting, top quality extras like hazel nuts, maple syrup and cocoa nib, balancing the salt and sugar accordingly. For this recipe, we combined healthly components from Debra Madison's recipe with more baroque add-ins from the Cheese Board recipe and some interesting inspirations from 18 Rabbits. The cocoa nib is a great one, but go easy and get reasonably good quality nib otherwise the flavor can quickly turn from an earthy, nutty complementary flavor to Count Choccula. Here's the nutritional information.
Shameless plug here: click the "Follow this Blog" link in the left-hand column. You'll get an email when there's a new posting. Here's the recipe:
Prep Time: 15 minutes
Cooking Time: 25 minutes
Difficulty: Super Easy
Coating
4 tbsp. butter
¼ cup almond oil
1 dash salt
1 cup almonds slivers, chopped (or sliced, unchopped)
1 cup pecans, chopped
½ cup honey
¼ cup brown sugar
1 tbsp. cinnamon (so called "ceylon" or true cinnamon is preferred, since it's milder and richer in flavor)
Freshly grated nutmeg to taste
Dash of real vanilla extract
Dry stuffs
6 cups rolled oats
1 cup unsweetened coconut shreds, (or flakes)
½ cup pumpkins seeds
¼ cup unsweetened cocoa nib, chopped into uniform, sesame seed sized bits
To keep this granola somewhat healthy, the sugary coating is minimized. If you like chunks of granola rather than a more cereal-like consistency, you'll need a bit more moisture and sugar and lay off on stirring it around.
Directions
Preheat the oven to 325°
Line 2 baking sheets with parchment paper
Make the coating
1. Melt the butter over a low heat
2. Add the chopped nuts, raise the heat to medium and cook for 5 minutes (until lightly brown)
3. Add the honey and brown sugar, reduce the heat to low and stir until melted
4. Remove from heat and stir in cinnamon, nutmeg & vanilla
Coat
1. In large bowl combine the dry stuffs
2. Add the coating and mix until oats are evenly coated
Bake
1. Spread the granola evenly over the 2 baking sheets
2. Place in the middle of the oven and bake for 15 minutes
3. Remove from oven and stir to redistribute the granola
4. Place back in the oven (swap shelves) and bake for 10 minutes more (or until golden brown)
Cool the granola completely before storing in an airtight container. It will last for a couple of weeks, and you'll save a boatload of cash.
Friday, November 7
7 Foods for the Economic Downturn
Maybe you only get that perfect bavette once a week, or once a month. But a tighter food budget doesn't mean you have to lower your standards. It just means you change your grocery pick list and find ways to make that yummy beef become a flavor in larger quantities of other, less expensive, complimentary foods.
I've recently been laid off, so this posting isn't just editorial much about nothing; I practice it day to day, like I would practice meditation if I had the patience...or yoga if I could get past all the hemp clothes and chanting. Here's my top seven ways to squeeze blood from my stoney wallet.
1. Coffee--Use that over priced, thermal sippy cup you bought out of guilt for the environment. Get a large french press and double your morning recipe. Have your normal cup, then drink the other one later from your stainless steel wonder. You'll be saving a few bucks a day as well as getting a spiritual lift by reducing your carbon footprint.
2. Vodka--Stop adding premium vodka to your cocktails. Nobody but nobody can realllllly tell the difference between vodkas once blended with Ocean Spray (or what have you). I personally hate vodka and cranberry, but I know a lot of people who drink it like fishes. For strongly camouflaged cocktails, switch to Smirnoff. It won the New York Times blind taste test a few years ago against brands like Ketel One, Grey Goose, and other premiums. Seriously! Save the good stuff for when it counts, like on the rocks with a twist of lemon peel.
3. Granola--Make your own granola. I know how that sounds, and while 18 Rabbits is fab, at almost $8 a pop, it's not worth it. The good news is that you can make something very, very comparable yourself in about 20 minutes that will last two weeks (my own recipe coming soon). Deborah Madison has a few good ones, too.
4. Reconsider the Bean--I know how lame this sounds, but wait! There's more to beans than those dusty vegetarian chili recipes from your Mooseweed cookbook. First, check out the delicious bean varieties available from one of my favorite local purveyors, Rancho Gordo. Their beans aren't the cheapest, but they've got an amazing array of unique heirloom varieties, their product is always freshly dried, and they've got flavor you won't believe possible in dried beans.
I like beans for soups, pozole, and even for making appetizers like Cannellini Spread to replace those pricey little jars one normally reaches for when friends come over. Big BIG Hint: If you don't have a pressure cooker, get one! It virtually eliminates all the soaking and par-boiling nonsense you normally have with beans, AND it destroys the sugars that cause...ahem...GI troubles. Pressure cooking makes beans easy and practical: it shortens cooking time to 20-30 minutes and lets you forget about buying Beano. Even more savings!
5. Friends--No, you don't eat them, but you do eat with them. Swallow your pride and tell them you've been axed. They'll honestly pity you, and many will buy you lunch! (Isn't that just so wrong??) OK, this isn't a long term, or even tasteful, strategy. But I was pleasantly surprised by the number of free sanwiches I got out of it! Thanks again, friends!
6. Chocolate--Sorry chocolate haters, this one isn't for you. But for the rest of the normal people, I've got great news! A piece of really good, premium chocolate has a very high satisfaction to price ratio. In other words, maybe you won't be having a rack of lamb every night, but you can have that square of amazing chocolate. It makes up for lot in my book, and it's worth the money. Please, people, don't buy Hershey's... it's just not right.
7. Canned Tuna--Learn how to use tuna as a flavoring and condiment, not as the main course. Canned tuna is only a few dollars and there are many ways to use it as a flavor component rather than the main event, and I'm not talking tuna casserole.
Here are a couple of my favorites: salade nicoise and pasta con tonna. Nicoise is a classic, and according to Julia Childs, the only way to go is canned tuna. She rejected, as I do, fresh or seared tuna in this wonderful salad. Canned tuna has a texture and flavor that's unique: it's pungency balances with vinaigrette and it's texture adds bite and chew to crunchy greens and tender boiled eggs.
My second favorite tuna dish is so simple you'll be embarrassed about your laziness when you make it. Simply boil a nice pot of any multi-faceted pasta like rotini or farfalla (not penne or capellini) that's been generously salted. Break up a can of drained tuna with a fork into little shards and toss in with a few tablespoons of good, aromatic olive oil, several grinds of pepper, and a healthy grating of Parmesan cheese. It's fast and amazing. Your evening meal will never be more inexpensively or rapidly prepared.
Check back soon for an exclusive look at my granola recipe. You'll love your cereal bowl, and wallet, for using it!
Tuesday, October 7
6.5 Ways To Find Time To Cook
Quality cooking time can feel like a luxury you can't afford, but if you make a plan weighing the costs against the benefit of free time to cook, there's a way to make it work. Fair warning, this plan is basically not really a plan as much as lifestyle adjustments around food...you could use the time you save to do almost anything.
1. Buy Lunch
It may be counter intuitive on a blog dedicated to quality eats, but seriously, do you have time to make lunch every day? I don't. Sock away the time you save for making relaxing meal at the end of the day. And there are mor benefits: buying lunch gives you an excuse to walk, the chance for variety, and makes cooking for fun at home feel much less like work. If you're budget conscious, follow number 5 and plan in a couple of lunches a week.
2. Learn to Love the Cardio Machine Everyone Else Hates
You work out to be able to eat what you want, right? Maybe that's not a totally healthy attitude toward fitness, but am I far wrong? You'd be amazed how much time you save by loving that sad machine nobody else wants. Think of it as cuts and do your workout already. You'll never have to wait, and trust me, your heart rate will go just as high.
3. Shop Like a Librarian
I know you're not a list person, but just add a little discipline to your process and make one for shopping. You'd be amazed how much time you can save by eliminating just one trip to the store every week. By the time you're done getting there, buying, paying, getting home and unpacking it's at least an hour. So keep a pad of paper and one of those half-pencils in the kitchen, and make a list as you go.
4. Get a CSA Box
First, a CSA is Community Supported Agriculture box of produce delivered once a week to a neighborhood spot near you. You'll not only feel good about the organic, lovingly raised produce you're eating, it's delivered! So you want to save time on shopping and figuring out what to eat? Let the box be your guide. And let the spoiling, overabundant produce be the necessity that spawns inventive, just in time cookery. Every meal's a nail biter.
5. Be Open to Leftovers...In fact, Plan Them
There's no shame in eating day old food. Go ahead and make extra pasta, dose the spare noodles with olive oil and refrigerate. On day 2, repurpose with feta, black olives, chopped organic CSA tomatoes (or whatever you've got that you can quickly blanch and chop) and fresh ground pepper. Ya, it's pasta salad, but it's quick, delicious, and it's ok to slide the scale toward efficiency once in a while.
6. Don't Skimp on Prepared Food
You may think prepared food is for sissies, but when used judiciously, it can pump up a meal from flat to phat in next to no time. Buy a few grilled prawns, your baby greens mix will love you fot it. If you're not into paying your hard earned cash for a grilled chicken breast, be your own prepared food provider by following number 5 and making extra to fuel the next couple of meals.
6.5 Buy Wine by the Case
If you find a wine you like with what you're likely to eat on a week by week basis, buy a case and stop wringing your hands over how many other wines are out there. It may feel painful to drop a hundred and something at the wine shop, but if you add up the cost of sourcing and choosing individual bottles, it's a lot. For your weeknight ham sandwich wine, you're better off finding a reliable go-to. If you don't drink wine, rejoice, you've already saved yourself hours and hours.
Saturday, August 16
You call it fresh corn buzz-kill, biologists call it peroxidase and catalase
Corny Story
Once corn leaves it's stalk, nothing good happens. Enzymes (see title) in the corn get to work converting the delicious natural sugars into starch. After just a few hours, your corn could be well on its way to what my dear old grandma used to call 'horse corn'. Yummmm!
Refrigeration slows the process, but the easiest way to stop it entirely is the boiling point. So if you find yourself with an armload of freshly picked corn, blanch the excess and freeze it rather than leaving of in your crisper drawer (or worse on the counter!)
Blanching Method
Drop shucked and cleaned cobs into boiling water for five minutes. Reomove the corn to an ice bath, cool completely to arrest cooking, then dry, wrap in plastic, bag on a zipper bag and freeze.
Once you've gotten your freezer packed, and whenever you're hankering for the fresh flavor of corn, drop into boiling water for 2 minutes or bring to room temperature and shave off the cob with a knife for fresh kernel flavor. You may be tempted to dekernelize your corn before freezing, but don't, it won't keep nearly as well as freezing it right on the cob.
The Slightly Whackadoo Chemical Method
There's a plan out there for food geeks who don't see the point in freezing when chemicals can do the job. According to Alton Brown in an episode of Good Eats, by adding some lime and a tiny bit of bleach, you can effectively deactivate starchifying corn enzymes right in your kitchen sink. That's all I'm going to say about that for now.
Saturday, August 9
Lemon Cucumber
Never heard of it? Neither had I until it turned up at my local market, the Bi-rite. They're almost the size of tennis balls, and plumply shaped as slightly elongated globes. They've got some tiny black dots on the outside, and they taste like a cucumber except perhaps a bit lighter and less vegetal.
Tuesday, July 22
Two Women Who Rock
Cocktails
The first set of v-casts are by the Orbit Room's sensational mixologist Alberta Straub. She's no longer at the Orbit Room, and to be honest, I've been totally unable to track her down! If anyone knows of her whereabouts, please clue me. I'm into Alberta, and would love to know what's she's up to!
Here's a couple of links to some of her v-casts. Some of them are techniquey, some are recipe oriented. The thing about her podcasts, while they're somewhat uneven and confusing from a creative standpoint, you really get the sense of how she approaches flavors and combining ingredients to make something fabulous! She's the real deal.
http://www.onnetworks.com/videos/cocktails-on-the-fly
Food Science
The second set are by a ridiculously spunky food science aficionado named Dr. Kiki. She's very bubbly and funny, but all of that barely masks a seriously brainy, hard core scientist who knows what she's talking about!
She's a prof at UC Davis, and somehow did these food science video podcasts. The content is a bit roughly presented and sort of uneven in depth (she could use some better writing!), but there are some amazing gems of information and she's a delight to watch getting all serious about teflon, the maillard reaction and my favorite, how to make your own home-grown ginger ale! She literally makes fresh ginger ale in a soda bottle. I love Dr. Kiki!
http://www.onnetworks.com/videos/food-science
Check out these vids. You won't be disappointed.
Sunday, June 8
Bumper Crop 1: Apricot Season. Make Compote!
Every Thursday, I get a small box of fantastic produce from a local organic, sustainably managed farm called Terra Firma Farm delivered to my urban neighborhood. I just pick it up from an apartment building foyer a block from my house. When I lived in Pittsburgh, PA, I did the same thing from a farm called Kretschmann's.
The great thing about the organic fruit and vegetable box delivery is that you get the best and freshest of what's ripe up at that moment in the season while supporting a local organic farmer. The bad part is that you get a lot of what's ripe. Often more than one can reasonably consume. Recently, I had an apricot glut.
Compote!
Most commercially available fresh apricots are picked early so they're firmer and less likely to get bruised in transport. They ripen in your fruit basket, but they often lack punch. The ones from Terra Firma were picked pretty close to peak with plenty of punch, but I had a pound and a half of very ripe apricots. I decided to make compote because it keeps fairly well in the fridge, freezes well, and I don't know a thing about home canning.
The recipe is simple, and the results can be used to spoon over yogurt, ice cream, a slab of cake or just eaten right out of the bowl. From start to finish, this took me about 45 minutes, but it was not intense at all. There was plenty of time to do other things.
The Recipe
Start with 1 to 2 pounds of ripe fruit, halved and pitted. By following the natural seam along the side of the apricot with a paring knife, you end up with the pit lying flat on one of the halves, making it easy to remove.
Boil a cup of water with about 2/3 cup of white sugar, two tablespoons of Grand Marnier, and a vanilla bean. When the sugar has dissolved completely and thing are bubbling, turn down the heat and add the fruit. Let it simmer gently for about 3-5 minutes. Be careful not to let the fruit go too far, or it will become mush. You want it fork tender but still recognizable as fruit.
When nicely tender, use a spider to fish out the apricots and set them aside in a bowl. Next, halve a washed and scrubbed lemon, squeeze it fully into the syrup, then drop in the squeezed rind and top with a pinch of salt.
While the syrup is simmering, add a tablespoon of raspberry jam into the bowl of a small sieve or one of those mesh tea strainers that opens like jaws. Drop in the tea strainer or arrange the sieve so that syrup engulfs and dissolves the jam into the mix without allowing the seeds to get away. During the cooking, make sure you taste (after serious cooling time in the tasting spoon!) for the acid and sugar balance. It's a bit hard to predict depending on the fruit you started with, so tasting is the only way to go.
Carefully cook down the liquid until it's about half the original volume. Watch it a bit, stirring from time to time. When reduced enough, let it cool on the counter top to room temperature. Remove the rind, strainer and vanilla bean then pour the syrup over the fruit and refrigerate.
The resulting compote yields soft, luscious fruit with a tart, sweet, vanilla scented syrup that's perfect with vanilla ice cream, apple pie, or yogurt. This morning, I put some on top of pancakes.
Monday, May 26
Bamboo Shoots Don't All Come in Cans
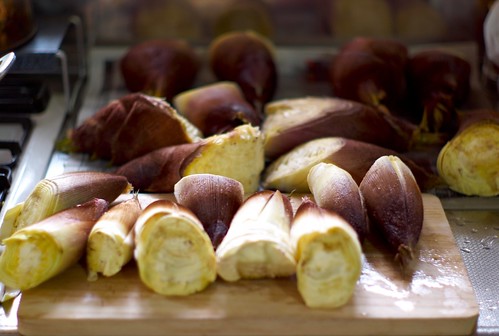
Recently I bumped into a friend who had come from the Clement street shopping district in San Francisco, an area of the city known for Asian markets. He discovered fresh bamboo shoot, and he said it was remarkably good and totally different than the blanched, beige squares most of us think about swimming in our stir fry at the local restaurant. (Thank you, Remy!)
After hunting around a bit, I found some myself and did a bit of research to figure out what I was looking at. It turns out there are hundreds of varieties of bamboo, but only a few are good eating. For a list of the edible varieties, check out Gib, the bamboo maven. When you shop for bamboo shoots in a market, you're most likely to find giant or sweet bamboo, common eating varieties. Bamboo shoots are harvested when they're just a few inches high.
Preparation
If you're lucky enough to find fresh ones, peel, slice thinly or julienne them, and then boil for 30 minutes or more in plenty of water. Cooking not only softens up the woody fibers and leaches out bitter flavors, but it also dissipates a small amount of hydrocyanic acid, which not only tastes bad, but is...well...poison. So, don't forget to boil! They're done when tender and all traces of bitterness are gone.
What's Different
Fresh bamboo shoots have a firmer, snappier texture and fresh vegetal flavor that gets completely lost in canning. You can use them in salads, for garnish on soup, or of course in your favorite asian dishes. Since they can be cut many ways: paper thin slices, square twigs, or rounds, they make for an interesting visual as well as flavor component. I cut mine into thin sheets and rolled them around rice noodles, fresh basil, barbecued tofu pieces, and a smear of hoisin.
Sunday, May 11
Chillis
Chillis are fruit because these often colorful pods bear seeds. And chillis are also a spice because its tender pith (or placenta) yields not only seeds but the pungent chemical capsaicin, a powerful palate burner with which we love to hurt ourselves in salsas, stews, and every manner of sauce. Apparently, we all love a little pain...chillis are the most cultivated spice in the world, followed distantly (a factor of 20) by black pepper.
A native of South America, there are hundreds of varieties of chillis grown throughout the world, though most we commonly eat come from a single species, the capsicum annuum. Those favorites include the bell pepper, jalapeno, ancho, seranno and even cayenne. Scotch bonnets, tabasco and a few others each come from other species, but there are only about five species we eat. No matter what kind you've got, note that chillis are hottest just before they ripen, but as time wears on, the potency wears off.
Making sense of the flavors
Chillis hotness come from capsaicin, a substance produced in the pith that migrates onto the seeds. If you want to remove heat from your chillis, split them in half or quarters and carefully excise the pith and seeds. You won't get rid of all the heat, but you'll reduce it significantly. Heat pungency is measured in scoville units, after Scoville the scientist. The scale is set at 1 for black pepper, and then chillis go up from there. Habaneros can reach 500K scoville units.
There are there are plenty of other flavor components in chillis other than heat, flavors that we regularly mess with and enhance by drying, smoking, and pulverizing. Chillis are in the same broad flavor family with eucalyptus and cinnamon. This family of flavors, the phenolics, are also found abundantly in wine, which in part explains why some wine writers talk about green pepper flavors and aromas when describing aromatic whites.
Choosing chillis
There's no great way to tell what a pepper will taste like, or even it's hotness, just by looking. There's no correlation between size and heat, shape, or flavor that you can rely on when shopping. You can discern ripeness in part by their green color, but the most reliable method for choosing the proper pepper is to sample, settle on a few varieties you like, and keep notes.
Chilli is a thickener
The walls of the chilli fruit are made of cellulose, so when they're dried and ground to a powder, they do a great job at thickening. The balance between their thickening power and the flavor they contribute is key, so make sure you taste before you adjust for thickening. It's easy to overheat a stew or sauce while you're trying to get the texture right.
Monday, May 5
Improvised Ribs
Making Ribs without a Grill
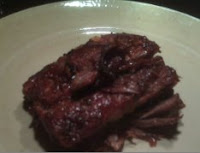
Yesterday my local market had a rack of heritage breed pork ribs. They looked so interesting, and even though I had never made them before (I'm ashamed to say), they looked too good to pass up. Everything I've heard about ribs reinforces slow cooking on a grill. But I had no charcoal and I was hungry. Was this a stupid move? Turned out no, not really.
The idea of slow heat in a shield of sauce is that the moderate heat and moist environment encourages tough connective tissue in the ribs (or any meat) to transform into gelatin. That's how we get that falling-off-the-fork tenderness that we all love in ribs, roasts and stews.
For ribs, brushing with barbeque sauce over a slow fire does the trick. Since grilling wasn't an option yesterday, I broke out the shallow braising pan with a tight lid and got it simmering with just a little stock. I looked for beer at first in the far reaches of my fridge, but all I had was Guinness in the crisping drawer, and I wasn't convinced that would taste all that great.
The 8 rib piece I had bought braised for about an hour and forty-five minutes, just barely bubbling. I watched Hitchock's Rebecca and had a glass of wine while they simmered away in the braising liquid. Definitely a recommended step.
Out of the Braising Pan Into the Fire
About 20 minutes before they were completely braised, I turned off the heat on the top of the stove and switched on the oven set to 400 degrees. As the stove warmed up, I made sauce. I didn't want to use a recipe so I started started with two tablespoons of soy sauce, a teaspoon of prepared mustard, a teaspoon of tomato paste, two heaping tablespoons of honey, a teaspoon (at least) of Frank's Red Hot sauce and a bunch of black pepper. It was decent, but it needed a little vinegar. After a few more adjustments, I decided to add a dash of bitters and some thinly sliced garlic. It was good, so I stopped while I was ahead, and I honestly don't know if the bitters helped.
The sauce was pretty viscous and when I spooned it onto the ribs, so it stuck well. I put the whole thing into a roasting pan and let it go for 20 more minutes. It caramelized nicely and finished tenderizing. They were done!
All in all, slow smoked ribs are better. There's no question. But for ribs in two hours without a grill, I have to say this braise then roast method was a winner, and I'd do it again.
Thursday, April 24
Cookware for Newlyweds
A friend recently went through my blog to see if I had any reviews of cookware, and sadly, my cupboard in that regard was bare. To make up for this deficit, I'd like to add a few thoughts about cookware and how to go about buying it.
Non-Cooking Considerations
I think that all of us who see ourselves as careful chefs would like to say that cooking vessels are purely about optimal function. But, just like food on a plate, the way pots and pans look in the kitchen (since they're not tucked away behind swinging doors with tiny round windows) is important. Picking pots is like picking sneakers, after you've decided on the function, also consider the design. If you hate the way the pot looks, it'll end up at the back of the cabinet.
Sets vs. A La Carte
Sets are great things to put on your registry, but in the end, your pot usage will vary depending on your cooking style. I don't think most sets really give you value over time because you'll end up only using a few pieces consistently.
Form Follows Function
Different sorts of pans do different things well. For example, for braising, you might want to get a Le Creuset dutch oven. Cast iron is ideal for slow cooking and even heat. Le Creuset are well made, last for years, and they're easy to maintain and easy on the eyes thanks to their enamel coatings.
Stainless
For searing, making sauces, and sauteing, you probably want stainless (like all clad). It's non-reactive with acids (like naked aluminum would be) and very durable. It inevitably gets scratched, so don't buy stainless based on a shiny mirror finish. It will soon be gone with regular use.
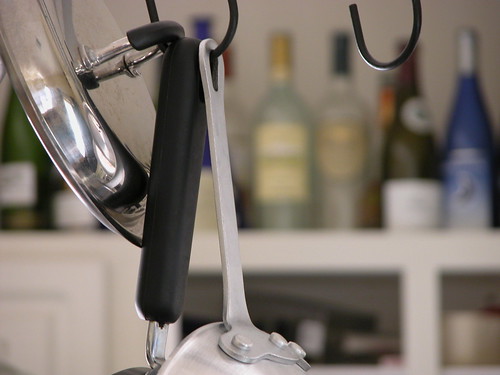
Since stainless gets very hot and will be filled often with heavy ingredients (like steaks), be sure the handle is easy to manage and comfortable. Any decent pan will have a handle that stays cool. Cheaply made pans have spot-welded handles (you can see the small dimples at the base of the handle) whereas well made pans are riveted.
Another hallmark of a well made pan is a layered base construction. Stainless steel, a metal great for cleanup and durability, is unfortunately a pretty poor heat conductor. That's why fancier pans add layers of aluminum and copper to the inside of their bases to compensate. Some of the pans seems to go overboard with a zillion layers, but it's not all just hokum either. Nothing spreads heat more evenly than copper, which is why many add copper to the mix. If you're going to use an induction cooktop (where an electric field heats up the metal instead of flame), you need to have ferrous metal somewhere in the mix. Pans will be marked whether they're for use on induction cooktops or not.
Non Sticks
I would never advocate getting only non-sticks because they don't develop caramelization as well as bare metal, but they're great for delicate foods like eggs that stick. There are new generations of non-stick that that can stand up to metal utensils and being washed in the dishwasher. The key to non-sticks is not to overheat them: the coating breaks down and throws off hazardous gasses when heated to temperatures over 500 degrees, so don't leave them on the heat without food in them or use them in the oven.
Sunday, April 20
The Most Useful Gadget in the Drawer-Simplicity!
1. A pastry knife/cutter/scraper (I have one that's flexible plastic). This thing works wonders for chunking off bread dough, pasta dough, and scraping batter from the bowl. You could cut bread or pasta dough with a knife, but that's exactly why you need this tool!
2. The medium-small Microplane grater. This works for nutmeg, cheese, and zesting lemons. It's sharp, easy to clean, and you don't need a million different ones. I even use it for pulverizing onions and tomatoes for paella. Don't use it on ginger, though, it cuts the fibers. Instead, just cut up chunks of ginger and pulverize with the back of a wooden spoon and strain with...
3. A medium strainer. This thing is for straining pastry cream, soups and gravies, pulping soft ingredients like ripe tomatoes and banana, or in a pinch you can even make tea with it!
4. A quick read thermometer. I found I need it less as I get more experience cooking meat, but it's a great learning tool, and it can answer any doubts you have over the chicken you just pulled out of the oven or off the grill.
5. Kitchen shears. Get the kind you can take apart and wash, that way you can cut chives one minute and take apart a chicken the next, throw into hot suds or the dishwasher, and then go back for more. (After chicken, I would make sure you wash carefully though, maybe even add a little bleach to the wash water, before using on chives again...just to be safe).
6. A wine tool...enough said. I give myself a freebie on this one, since there's really no substitute. I like is this one. It also doubles as bottle opener for old skool beer or mineral water.
...and since 6 didn't really count as a gadget...
6. A kitchen scale. I've got an inexpensive one that does ounces and grams. It's essential for baking, though unfortunately doesn't get used very often.
7. Measuring spoon set. Sort of counts as a gadget, I guess.
So what do I do about those lemons or limes that need to be squeezed? I roll the citrus under my palm on a counter top using pressure to loosen up the fruit, then slice in half, stick a fork in the pulp and squeeze. Move the fork around a bit to get even more juice.
One final note on gadgets, here is the most egregiously superfluous gadget of all time...behold this misguided, inelegant waste of resources.
Thursday, April 17
The Perfect Pantry 2: Olive Oil
Oils you'd Eat Out of the Bottle
There are a few oils that you'll want hanging around just to add zazz. Olive oil is the obvious one, but peanut oil, mustard seed oil, grape seed oil, and walnut oil all bring varying levels of complexity and flavor to your food. There also oils whose sole purpose in life is to deliver some other ingredient, like garlic infused olive oil or truffle oil.
Olive Oil
The well-stocked pantry has at minimum a high quality "eating" olive oil for fragrance, floral or spicy notes, and velvety roundness for greens, dipping bread into, or putting the finishing touch on everything from fish to flatbread. Like any crave-able food, there are hundreds of nuanced choices ranging from reasonable to ridiculous in terms of price.
California Oils
My choice for a mid-priced, always-on-hand oil is a local (Bay Area) grower called Bariani. They've got a great, unfiltered extra virgin that's a solid, full bodied all-around choice. I don't use this oil for cooking because heat destroys it's complexity, but I'll splash it on almost anything.
When I want to go a bit more upscale, I like Seckinger Arbequina. Arbequina olives are small, brown fruits mainly produced in Spain that produce a uniquely rich and peppery, delicious oil. Becky Seckinger is a fourth generation producer who makes small batch, organic oils that can handle center stage in any dish. She's got a bunch of varietals in addition to arbequina.
Storing Olive Oil
The key to experimenting with oil to try one at a time (in addition to your 'house' oil) since it ages quickly and dies once it's exposed to oxygen. So, in addition to only keeping small quantities on hand, it's best to keep all of your oils, no matter what you choose, in the fridge, not in the cupboard.
Next time, varietals, odd ball, and frying oils.
Photo credit goes to Shelley, who's got a Slow Food blog. Check it out here: http://lfnn.blogspot.com/
Tuesday, April 15
The Well Stocked Kitchen: Start with Salt & Pepper
Salt
Alice Waters councels that one thing all cooks can do to immediately improve the taste of their food is replace the iodized salt with pure, unadulterated mineral. Alice's palette is a bit more developed and naturally acute than most of ours, but I'm fully on board with this tip. Replace your morton's iodized with kosher, already! If you're taking a multi-vite or eating kale, you're already getting more than enough iodine. Taste different salts next to each other...iodized salt definitely has a chemical note.
There's been a lot of press about varietal salt: black salt, sel de mer, large crystal, and Himalayan. These varieties are really fun to play with, but they're not essential. If you're intrigued, by all means buy some upscale salt and play around. If you're keeping it simple, buy yourself a big box of kosher salt, and well, salt it away. It's part of your well-stocked pantry.
Pepper
Pepper is as complex as coffee, and many of the same rules about quality apply: good pepper has more complexity, it only grows well in particular parts of the world, it does not age well once ground up, and the good stuff does tend to cost a bit more.
Fortunately, it's easy to find great pepper. Penzey's has a great selection. High quality pepper comes mainly from the east coast of India. Two of the most celebrated varieties are the Tellicherry and Malabar (in order of celebration). If you've never tried Malabar, give it a shot. It's loud and good, but Tellicherry is fruitier and more complex: perfect for salad, where you can really taste every nuance.
To stock the perfect pantry, consider buying a big bag of peppercorns and a good grinder. For producing nuggety cracked pepper, I like Peugeot's hardened steel burr mechanism: they make a variety of body styles, but I would avoid the acrylic one because they flex a little too much. I have the aluminum "Perfex" style. It's small and simple but works reliably year after year.
You can put the rest of the peppercorns in the freezer and use them as you need them, they'll keep fairly well for a couple of months. Salt never goes bad, it's a mineral after all, as long as you keep it dry in an airtight container.
Part 1 of a Series: The Perfectly Stocked Kitchen
The Pantry
In part one, let's talk about the pantry because it's crucial to happiness. The pantry is your savior, your comfort, your magic trick, and your ah-ha inspiration. If you don't have an actual pantry, that's ok. The pantry is an idea, not a physical space. Anything you've got that's a base ingredient of more than one finished product, things that polish up or finish dishes, or things provide the foundation for meals like pastas or rice are part of your pantry no matter where they're kept. (If you've got a physical pantry, that's a plus because you can scan it's contents just by turning your head instead of rifling through cabinets, like in my house).
Getting the Obvious Out of the Shopping List
At the very least, pantries ought to have staples like flour, rice, and sugar. But they also need to have flexible components you can put into other things like canned tomatoes, dried beans, and a few blue ribbon items like olive-oil poached garlic, truffle oil, and Tabasco.
Over the next few weeks, I'll be doing an occasional look at what should be in your pantry to make your life easier, your cooking more enjoyable, and keep budget and sanity in check.
Next up: seasonings to keep on hand.
Sunday, April 13
A Review of the Breville Ikon Removable Plate Grill
Before all you purists roll your eyes, consider that in addition to making paninis, you can come home from work late and cook fresh chicken breasts and pile of asparagus and be done in 10 minutes flat..with carmelization! Then just throw the removable plates into the sink or dishwasher and you're ready to settle down to a reasonable dinner. The lid of the press not only cuts cooking time down significantly by applying two cooking surfaces, it also shields spatter and cuts down the mess.
Admittedly, cooking this way is not how I like to on saturday afternoon. But on work nights, it makes things a lot easier. Or did, I should say. After wearing out my Cuisinart model grill and panini press, I replaced it with an a simpler iron plate that goes right on top of the stove burner. If I want paninis, I just heat up a cast iron skillet and put it, bottom down, right onto the sandwich.
I'm still open to the right electric grill/panini press with removable plates, but the perfect appliance doesn't exist yet, as far as I can tell.
The Removable Plates
Most removable plate grills have interchangeable cooking surfaces that fit onto their heating elements so you can convert them into griddles. Some even let you open them up completely so both cooking surfaces are flat, doubling the total cooking area. If you've got a big brunch party, this can be extra helpful when all burners are occupied.
Most panini presses/grill cooking plates are made with some sort of non-stick coating. When the plates are removable, you can simple wash them like you would any non-stick, and move on with your life. If the plates don't come out, get ready for serious wiping. If there's any type of fat rendering involved, life just gets messier and requires more wiping. Really, if the plates aren't removable, plan for mainly panini pressing or griddling pancakes.
Comparing Removable Plate Grills
George Foreman grills exploded the market for electric nonstick two-sided cooking, but along with dubious health claims about draining away all kinds of fat (who would really want that??) they're made with quite a bit of plastic and generally suck in the looks department.
The Cuisinart Gourmet Griddler removable plate panini press/grill (around $100) has a metal body, but it's quality isn't great either, especially around the controls. The knobs have silver foil on them to make them look like metal (nice try guys) and inexplicably have two knobs that do the exact same thing, adjust the temperature.
These flaws are fairly minor and easy to overlook, but what's not is the awkward fat drains that require you to position oddly shaped cups under a spout ever time you use it, and the fact that the teflon on the removable plates didn't stand the test of time. After just a few months of regular use, they lost their nonstick properties and began to flake. I wouldn't buy another one.
The Breville Ikon Removable Plate Grill's Daddy
The Breville Ikon removable plate grill is based on an existing model, a larger grill/griddle/panini press. The larger model is perfect for pancakes and panini, but not really for "grilling" because you can't remove the plates to clean them.
On the positive side, the larger model has a brilliantly smart, built-in fat drippings tray that's designed as a simple, easy to handle drawer. It also has a very functional, cunning hinge that enables the cooking surfaces to open out flat or lock partially open in a number of upright positions, providing a huge range of options. It even has a tilt mechanism that lets you slope the cooking surface to encourage fat or liquids to drain off, or un-tilt to griddle pancakes flat.
The quality of this thing is indisputable. It's a heavy, really well-made appliance with solid controls, industrial switches, and evenly distributed heat. It warms up quickly and powerfully, and has a lot of nice touches like built in cord storage and a brushed steel surface that's easy to clean.
Unfortunately, the plates don't come out (really, its biggest drawback) and the permanent cooking surfaces are one grill and one griddle. If you use either one for fatty, messy foods you're stuck cleaning with sponges and rags because you can't run this large appliance under the tap. The second significant bummer is that you can't simply switch off the lid heating element, so when you're using it for pancakes only, the top part heats wastefully.
If Breville were to redesign this thing with removable, interchangeable cooking plates and a three position switch (turn on lower surface, turn on both upper and lower surfaces, and everything off) this appliance would be nearly perfect.
The Skinny on Breville's New, Skinny Offering
I was excited when Breville, a brand that makes a very nicely designed home coffee burr grinder and water boiler as well as the grill/press I described, came out with a mid-size removable plate grill. It costs around $150 if you shop around.
Overall, compared with the quality of its predecessor, the new model is pretty disappointing. They kept the integrated fat drain/drawer idea (which is good in theory) but on this model it's small, fills quickly, and it's awkward to pull out when it's full of drippings. Even more maddening, the drawer has a metallic strip (purely for looks) glued onto the outside which gets very hot. So you have to wait for everything to cool off before you can handle it. If they had left off the strip, that would not be a problem.
The metal body feels much more cheaply made than other Breville appliances, and it lacks the 180 degree hinge, so you don't gain a larger griddle surface. It comes with one "bonus" griddle surface to replace one of the grills, but it really should come with two (as well as open out completely). That's disappointing, too, and very unclear in the marketing language I've seen for this thing.
Overall, it doesn't feel well made enough to be a Breville, or well enough to justify the price for it's size and features. Sadly, I must give this appliance a B--. I'm rooting for Breville to rethink and retool this design to be a little smarter and well made like it's many siblings.
Friday, April 11
Sous Vide, & Why You Don't Need to Try This at Home
Sous vide keeps cropping up on TV shows like Top Chef and Iron Chef as a cooking method. It may seem exotic and new, but in fact it's been around since the 70's.
Sous vide literally means, from the French, "under vacuum". The process, in a nut shell, involves vacuum packing raw food in plastic, then submerging the bags in a circulating, temperature-controlled water bath that brings food to temperature slowly.
Chefs like sous vide because it produces textures and flavor that can't be achieved using direct heat. According to Harold McGee, cooking at low temperature for long periods of time breaks down whatever you're cooking to produce tenderness without the usual side effects of high temperature cooking, most importantly, drying and changes in flavor. Some meats need to be cooked for over 24 hours "sous vide" to achieve this effect.
Low temperatures and long cooking times may seem like a party for germs, but since the ingredients are sealed in plastic under vacuum, aerobic bacteria can't grow. But anaerobic bacteria (botulism bacteria) can. So it's critical to maintain precise temperatures that kill them off.
The high risk of bacterial contamination means sous vide shouldn't be attempted at home without proper vacuum sealing equipment and a professional circulating, heated water bath. Let's face it, how many times do you come home from a hard day of work craving a sous vide foie gras?
Thursday, April 10
An Open Letter to Bon Appetit
Dear Bon Appetit,
You were always the slightly too precious one showing up in my mailbox every month, with your muffin basket aesthetic and heavily sauced prose. But I knew that about you, and I looked past your affectations for ideas. Presentation ideas. Ingredient ideas. I'm happy you want to cast off that tired image, but I think the baby and the bathwater may be traveling as a couple right now. Month after month since you've changed, I've been considering your new you, and so here are my thoughts.
First, a magazine is not a website. Seems like an obvious point. But how else to explain why you've adopted these overbearing teardrop and slash motifs throughout your pages? Unlike a website, where visual cues help you keep the site "tree" in your head, magazines don't have that problem to solve. That's the beauty of magazines. They're not linked: you just keep turning pages, and eventually you'll run out. So I don't need those teardrop tokens like a breadcrumb trail to help me find my way...I already know where I'm going (to the next page).
Second, let's talk about the new look of your pictures. I admit that food photograhy often suffers from being overly shiny, posed and polished, but it should at least pique your imagination if not make you downright hungry. But food photography shouldn't just be food porn, made to be consumed only by the eye. There should be information packed in. Like how to present ingredients elegantly.
I've noticed recently you're trying for more graphic, bolder food styling and photos. But making plates of food into decomposed, two-dimensional color smears isn't working. These types of images may look good when I squint hard at their high contrast, over saturated flatness, but when I look carefully they look like someone vomited on the plate, however artfully. I would never arrange my food that way to present it to people who I expect to eat it. And it doesn't help me the next time I'm trying to plate something.
Finally, I get the sense that your art directors are running amok with Adobe InDesign, which is a powerful tool indeed. Bubble type, helvetica with no leading, and microscopic font sizes may work on high res screens in evenly lit offices, but they don't work in print. Your pages are looking dense, and your layouts are reaching for retro hipness that can only work when irony fills the air like smoke in a Berlin lounge. Food magazines like you, Bon Appetit, can be many things, but ironic doesn't make it to that list.
I know you're experimenting, and I applaud it, but I don't think it's working yet. I'm still loyal, so I'm waiting patiently for you to get over your mid-life crisis.
Yours Truly, Benjamin
Tuesday, April 8
The Sugar Coated Truth
In Baking, Sugar is a Liquid
Sugar mixes with water like lonely dogs in a parking lot, and then it holds on tight as a tick. This hydro-greediness gives cookie dough the lubrication is needs to spread more fully on the baking sheet, and then retain moisture longer in the jar. Leaving sugar out will only give you minor caloric savings (as compared with say, the butter) and just results in higher, drier disks you won't want to eat at all. According to my crude calculations, cutting sugar in half, using an average cookie recipe, will only save you about 15-20 calories per cookie. Not worth it!
Sugar Versus Protein
Whenever you bake something that's leavened, from cakes to pancakes, you're making good use of wheat proteins to create a sticky mass capable of holding bubbles while it firms into a delicious, cakey matrix.
This stickiness comes from gluten, a protein that only forms when water is around. Since sugar sequesters water, it inhibits some of the protein from forming. That's why pancakes made with no sugar can be bready and tough, while those made with sugar are tender and light.
It also explains why sugar is a preservative: it literally sucks the juice out of germs.
Monday, April 7
The Importance of the Liquor Cabinet
Getting your place together with an eye to entertaining can shake up how you go about it. For example, for years I've scattered liquor and aperatif bottles along with their appropriate (more or less) glassware across various and sundry cabinets, bookshelves, and even a few less dignified spots (i.e., cardboard boxes shoved under the bed). On top of that, I never had the right number of tumblers for all, a fact usually only brought into clear focus when the guests arrived. Now I've got a liquor cabinet.
Welcoming and Organized
Nothing says "hi" more warmly than the words "Can I get you something to drink?" accompanied by a short walk to the liquor cabinet. In addition to establishing a party vibe, it can keep you, the host, more organized. By putting all the libation paraphernalia in one place (alcoholic or not), the drinks and party flow more easily with fewer last minute trips to Crate & Barrel for hi-balls, or the over-priced package store on the corner for Cinzano.
Route the Traffic
In addition to being an invaluable organizing tool, the liquor cabinet in the dining area establishes a beachhead that helps you conquer the greatest foe to party flow: kitchen stickiness. Instead of congregating around your cutting board, guests will naturally migrate to the rest of the floor plan--a key to your sanity as you get the meal or appetizers together.
The Style Angle
If you follow the philosophy, as I do, to never let an opportunity for accessorizing go untapped, you need a liquor cabinet. It's the perfect spot to express your inner ring-a-ding-dinger, so go ahead and get an ice bucket, a silvery tray, and maybe even some quirky red tag sale glassware. No one judges the liquor cabinet accessories.
Basics
A well stocked liquor cabinet doesn't need to cost a bundle, or require 20 bottles with exotic varieties. Here's a list of basics that will cover almost every one's taste and budget.
1. Get yourself an inexpensive vodka. Most people will not be able to tell the difference when mixed. If you're sensitive about leaving plastic bottles lying around, decant.
2. A reasonably good gin. Unlike vodka, you can really tell the difference. I like Tanquerey and Bombay Saphire for their quality and relatively reasonable price. There are better gins, but you won't be sorry, either.
3. You need some whiskey. There are some great bourbons such as Evan Williams Single Barrel, but I always keep Knob Creek on hand. It's solid, tried and true...and frankly, not that many people drink it straight so you only need a small bottle to start. If you get into it, there's a whole world of bourbon to explore.
4. Sippin' Tequila...get a good one.
5. Margarita Tequila like Cuervo. When it's mixed with all of the citrus and sugar and salt, there's so much going on that the tequila won't play a leading role.
6. Some silver rum for Mojitos.
7. You also need a few condiments: Angustura bitters for whiskey drinks, triple sec for sprinkling on berries and putting in Margaritas, and some white vermouth for martinis and pan sauces (yum).
8. You also need some basic equipment: a cocktail shaker, a few tumblers, and a shot glass for measuring. Pretty much everything else can be improvised.
Saturday, April 5
Sweet Lime, As Seen in Darjeeling Limited
I was curious and surprised to find a new citrus in my local produce store: sweet lime. Another variation on the citrus theme, sweet lime is a juicy, sweet rather than acidic fruit reminiscent in flavor of grapefruit and mandarin oranges.
In the film Darjeeling Limited, sweet lime was served as a refresher to passengers settling into their cars. I did some checking around (i.e. Wikipedia) and learned that India is one of the largest producers of sweet lime in the world, where it's both consumed for fun and medicinal purposes.
I've never personally had any sweet lime juice there, but a survey of websites suggest that it's mixed with some honey or sugar similar to lemonade for serving. If anyone has had this drink in India, where it's called mousabi (musabi / mosabi), please comment and let it be known how it's typically prepared.
Turning Sweet Lime into a Cocktail
Never one to stand on tradition when it comes to mixology, I juiced a few sweet limes and tried them in traditional citrus cocktails. If you come a across some sweet limes, try substituting some or all of the lemon or lime juice in your favorite recipe with sweet lime. You'll need about one third of the total sugar than when using lemons, and it delivers an interesting, subtle twist.
I'm a gin person, so I tried came up with this recipe. Try it for yourself and see what you think!
The Sweet Lime Limited
2 ounces of gin
3 ounces sweet lime juice
2 Basil Leaves
1 ounce simple syrup (a.k.a. sugar water, a tablespoon of sugar or more to taste dissolved in a little warm water will do if you don't have simple syrup handy)
Pinch of salt
Splash of Soda Water
Combine and serve over ice in an chilled tumbler.
For some additional comment and photos, check these out from reader Dave Johnson.
Monday, March 31
Clean Up Time, An Idea for Dispensing Dish Soap
After a night of fun and fabulous fare at your Friday fete, it's time to clean up. Trouble is, most supermarket dish soap packages are ugly, as are many of the You Know Who and Beyond pump bottles. On top of that, they gunk up quickly.
The Syrup Soap Dispenser After a couple of months of searching, I stumbled across a diner syrup dispenser which turned out to be perfect for dish soap.
It's one handed, cuts the flow of detergent with a flick of the the thumb, and it's not expensive. I got one for around $7.00, less than you pay for many special purpose pump bottles. It doesn't clog easily, and it's easy to clean up...just rinse. Best of all, it doesn't look awful next to the sink!
Tuesday, March 25
Savory Citrus: Olive Oil Lemon Confit
They Don't Call it Zest for Nothing
The bright aromatic oils in the skin of lemons, called the zest, lend heady, floral notes to almost anything without any acid bite. To mellow it a bit so that it blends nicely with salads, soups, stews, meats and fish, make yourself an easy, no fuss citrus zest-olive oil confit. You can experiment with all sorts of varieties, but the regular supermarket variety (lisbons and eurekas) work great.
Lemon Peel Confit
Take about 8 lemons, peel them with a sharp paring knife avoiding as much of the white, spongy pith as you can. It sounds like a lot of work, but if you're reasonably good with a knife it only takes minutes. You can also use a vegetable peeler.
Get the zest ready by placing into a strainer that will conveniently fit into a pot of boiling water. Using the strainer, alternately plunge the zest into softly boiling water for 10 seconds and then into ice water for ten seconds. Repeat this process three times and then set aside. Parboiling softens up the peel, removes any leftover food wax, and tones down the zest's natural sharpness.
Next juice one of the leftover lemons into a small pan and add one peeled garlic clove and two cups of olive oil. Now comes the poaching part: put the oil-juice-garlic mixture on low heat, add the parboiled zest and steep the whole thing for an hour.
The goal of the confit is to heat the ingredients without browning anything, allowing them to soften, meld and release flavor slowly. Once the poaching is complete, cool the confit to room temperature in the pan, transfer it into a wide mouth jar and refrigerate. I've kept zest confit for up to a month, at which point it has usually already disappeared into everything from sandwiches to marinades, soups, and sauces.
Confit Everything
If you make the zest confit and like the method, you're in luck. You can make confit out of almost anything including onion, garlic, shrimp, fish, tomatoes, nuts, figs and more. It's not just for duck anymore.
Saturday, January 19
Egging On-Freshness, Brown versus White and More
If you thought you loved eggs, ask yourself if you'd eat this burger? Fresh from Catalonia, this sandwich is not for the egg faint-of-heart. If I were going to eat this sandwich in the US, I might ask for a pasteurized egg. If I were in Europe, I'd just eat it and shut up about my health concerns.
Egg Age Test
Perhaps eggs deserve a higher place in the literary tradition than the Humpty Dumpty genre. For example, why not write, "His heart dropped like a fresh egg in pot of cool water," or "Her spirits soared like an old egg in a pot of cool water."
Ok, so the metaphor doesn't work well for emotions (except on opposite day) but the pot of water is a handy, easy freshness test. So if your eggs have been hanging around for an indeterminate length of time in the fridge, break out the bad metaphor and double check them with a quick dunk. If they sink, eat them.
Eggshells are porous. As they age, moisture inside the egg slowly evaporates through the shell and gets replaced with air. So a dried up egg will float, and who wants a dried up egg?
The Color of Eggs
Advertising notwithstanding, here's no inherent nutritional or freshness advantages between brown or white eggs. Brown eggs come from hens with more pigmented feathers and other features, and white eggs come from hens without significant pigment in their feathers and other features. There are other varieties of hens that lay blue and speckled eggs, but it's a bit harder to pick those up at the supermarket.
There are plenty of nutritionally enhanced eggs on the market as well. If you're not a fish eater, for example, and trying to increase your Omega 3 fatty acid intake (an arterial lubricant that can help with cardiovascular health) you can get eggs from hens fed an enhanced diet. Luckily, you're on top of the food chain, so you can reap the benefits of the chicken's repast.
It's a 75 Calorie Wonder? Or Wonderbread?
A hard-boiled egg has about 75 calories, 6 grams of protein, 212 milligrams of cholesterol and about 5 grams of fat. Taken all together, it's not a bad balance and it will fill you up, but the cholesterol content of an egg represents about 70% of the recommended daily intake. All of the fat and cholesterol in the egg is in the yolk, but so is half the protein. Again it is proven that there is no free lunch.
The Quick Delicious Way to Eat a Hard Boiled Egg
Eating a hard-boiled egg need not be a simple salt and pepper affair, although that's pretty good. But it need not be a production either. Here are a couple of suggestions that I love, and the reason I like to keep a couple of hard boiled eggs in the fridge at all times.
Peel the egg, slice it in half, sprinkle it with salt and cracked pepper then drizzle with a tiny amount of olive oil. The added richness and flavor of the olive really elevates the egg.
Get the egg ready to go as above, but instead of salt and pepper, try a little Tabasco with a little olive or peanut oil. If you feel like going crazy, use a dollop of mayo instead of oil (definitely not the healthy choice, but delicious).
Again, prep your egg, then shave a little Parmesan and grind a little pepper over it. You really don't need much more than that.
Saturday, January 12
More About Eggs: The Cheese Omelet
When I make a cheese omelet, I aim for a uniform, puffy, pale yellow round that's neatly folded over a few shavings of Parmesean, Romano or other sharp cheese. Subtely seasoned with butter, a bit of salt, and a dusting of finely-ground pepper, for me the perfect cheese omelet is moist and light without a trace of runny, uncooked egg. The Denvers, Westerns, and Spanish omelets of the world might be fine for dinner, but for breakfast, simplicity trumps place-names.
The Charming Curd
The trick to making omelets is to stop thinking about omelets and start thinking about large-curd scrambled eggs set together at the last moment. The truth is that there's really no good way to cook an omelet all the way through by letting it just sit in the pan (unless you're making frittata, which is something else entirely).
Don't Be Afraid of Alien Technology, Except for the Microwave
Although you may be tempted to escape the burnt egg debacle using a microwave, you're inviting rubbery texture and flattened flavor to the table. Microwaves are blunt instruments: too blunt for the egg.
Instead, embrace the other alien kitchen technology: the non-stick pan. There are some wonderful next generation pans that are tougher and safer than non-sticks you grew up on. The caveat with all non-stick pans is not to overheat them, but for eggs, this will never be a problem since eggs do best cooked on medium-low heat. If you're a die hard, you can make an excellent omelet in a high quality non non-stick pan, but just be prepared for a steeper learning curve on getting your omelet out cleanly.
Making the Goo, Gently Does It
Crack two or three eggs into a bowl, add a teaspoon of water for each egg (not milk or cream) and blend with a fork (not a whisk) until the yolks have broken and the mixture has barely combined. You're not looking for milkshake smoothness, more a rough mixture. Whisking adds air and can also alter some of the proteins in the white, which can toughen the final product.
Now add a big pinch of salt. Yes, I said it! While there's a lot of talk about salt toughening eggs, according to Harold McGee (who would know) it's balderdash. So boldly salt & pepper your eggs before cooking: your omelet will have better flavor all the way through.
Cook the Goo, Gently Again
Get your non-stick skillet going at medium-low heat and add a little butter. Reduce the temperature to low and pour. As soon as the egg hits the pan, curds will form, and it's time to begin a slow clockwise lifting and turning-over motion.
Using a silicon or wood spatula, work your way steadily around the bottom of the pan making sure to lift and turn every square inch. The goal is to bring the whole thing to no more than 150 degrees Fahrenheit. Much beyond that, and the custardiness will give way to inner tube.
Tender is the Morning
Keep lifting and turning until there's just enough uncooked egg left to glue the whole thing together and rest your spatula. Remove the pan from the heat and let it set for a few moments, flip it over in the pan if there's still some uncooked egg on top (or don't if there's not), shave a little sharp, salty cheese over the round, fold it over using the spatula, and slide to a warmed plate.
Garnish with a little pepper if you like, or just leave it alone. It's already a little bit of breakfast heaven. Why mess with that?
It's a French Wrap
This custard style omelet is attributed to the French, and Julia Child is often cited as the chef who brought the technique stateside. The word omelet is adapted from the French word omelette, which in turn most likely derives from a latin word meaning layer.