 Temper, Temper...
In part 1 of Chocoluv, we traveled the road (briskly, mind you) from cocao pod to cocoa and chocolate. And while we're on the subject, notice the swapping of the last two letters from [c-o-c-a-o] to [c-o-c-o-a]. Cocao (pronounced ka-Cow) refers to plant and its parts, while cocoa (pronounced Co-co) refers to the food product either in the form of powder or as a component of chocolate, as in 'cocoa butter.'
Once the fermented, roasted chocolate nib has been super-finely ground in the chocolate manufacturer's conch, it's essentially ready to be made into bars: both eating bars, and ingredient-for-other-confections bars. However, there's one last thing you need to know before we get to the actual eating, and that's the process of tempering. Although it wouldn't kill you to remain unaware of tempering, knowing about it will explain both why professonal chocolate bars are glossy, snap nicely, and melt in your mouth...as well as why the chocolate covered strawberries you make at home always turn out so damn sticky and dull.
Tempering involves the controlled warming and cooling (and warming and cooling again) of chocolate in a way that encourages the cocoa butter to become uniform in structure. Cocoa butter, the fat that holds the ground up nib in suspension, forms crystals as it cools to room temperature. There are several kinds of crystals that it can form, but the best for chocolatiers are those that happen at around 88 degrees farenheit, but only after all the other types of crystals have been melted thoroughly away. Once the right sorts of crystals get a solid start, subsequent cooling (and crystal formation) should spawn more of the same. If done correctly, the end product has a melting temperature that's just slightly below body temperature, perfect for creating that 'melt in your mouth' experience, and as an aesthetic side benefit, leaves a glossy shine and satisfying snap.
Those sticky strawberries? The chocolate got too hot in the double boiler and broke the temper of the chocolate. To avoid that problem, heat your chocolate very slowly and gently and remove it from the heat before the last few lumps melt completely. Keep stirring. Most likely, the last few lumps will melt eventually, but even if they don't, go ahead and coat your strawberries...this slow, gentle method preserves the temper.
Now to the Good Part: Tasting
This is the part of the blog that you can crib for hosting your friends over for a chocolate tasting. There are many resources for chocolate tasting wheels, charts and tables, but here's a short and sweet guide, cribbed itself mainly from McGee:
Remember all those complex reactions I mentioned in part one that take place during fermentation? Well here's how they manifest in your mouth:
Taste for bitterness and astringency. Those characteristics come right along with the bean. They're from compounds that the bean produces naturally, in part to fend off pests. Some of these get destroyed or removed by the fermentation, roasting, and conching processes, but not all. Caffeine, it turns out, is one of those (whew!).
Taste for fruit, wine, and vinegar flavors. These complex undertones result from the sweet pulp having been fermented. The acids and alcohols that are produced as the pulp transforms from plant food to chocolate pre-cursor leave behind complex flavors, just as they do when wine grapes are fermented. As the bean itself is decomposed and digested by the various helpful microbes in the fermentation process, almond and dairy or flowery notes may arise.
Finally, check your taste buds for the nutty, carmel, earthy and charcoal flavors that arise from the roasting process. Just like coffee, nib that has been roasted more intensely will taste more burned and charcoal-like with stronger caramel overtones. There are roasting styles for nib, just like there are for coffees.
What to Taste, or Who?
There are lots of great new producers out there to sample. My advice is to try a few of the big names like Scharffen Berger and Callebaut for reference. These are the bars that will be very consistent from year to year, and probably not too challenging. Then move on to more focused, interesting micro-producers whose tastes and the character of their cocao sources really come through.
Here are a few names. Get a bar from each when you shop:
El Rey (Venezualan single origin beans)
Michel Cluizel (French maker)
Grenada Chocolate Company(organic and fair trade maker)
Valrhona (single origin bars)
Casa Don Puglisi (vegan and beautifully presented)
Simple Tasting Steps
These steps were first revealed to me by SF local chocolate purveyor Adam Smith, who runs a fantastic little shop called Fog City News. I was lucky enough to attend a staff tasting, and here's what I learned:
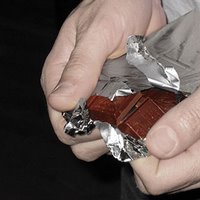
1. Unwrap the bar and check it for shine. You're seeing the results of tempering
2. Snap a piece off...did it snap nicely?
3. Smell it. Can you detect any of the flavor notes mentioned above? Think about flowers, fruit, spices...see if the chocolate reminds you of anything.
4. Take a bite and let it melt. As the chocolate temperature rises in your mouth, it will melt and throw off even more aromas. How intense is it? How sweet?
5. Repeat!
Where to find it?
Chocolate trade is surging, so it's easier to find high quality product than ever. In San Francisco, where I live, Fog City News and Bittersweet Cafe are two great places to try. Fog City carries over 200 bars and they do chocolate tastings on a regular basis with the staff so they're well stocked and informed. Bittersweet also has a wide selection and performs organized tastings. I attended a tasting that was really interesting and informative. If you're in SF with a group, I recommend it.
I invite you to join the chocoluv party...where do you get chocolate in your town?

No comments:
Post a Comment