Beware holding forth on this topic if you're at a barbecue and there's a Dixie cup full of something to drink anywhere within earshot, but it's gotta be said: Propane grills are for sissies. And I don't mean sissy in the fierce, bring-it-on-bitch sense. I mean it in the 'I think I'm an outdoorsy grillin' man (but I'm really just copping-out.)' sense.
Why? Because cooking on propane outdoors is mostly about the pleasure of the person doing the cooking--they get to be outside and it's easier--but this method doesn't really deliver the "grilled" part of grilling to you, your loved ones, or worse, your guests! There are some extraordinary measures you can take to compensate for propane's lack of anything in the way of a contribution to the food except heat, but even on those terms, it can't measure up to the sheer intensity of a charcoal fire.
It's Getting Hot in Here
Break out the Weber and fire up a bag of hardwood charcoal. If you have the industrial thermometer handy, you could be seeing six or seven hundred degrees registering once your fire has gotten going. That's enough to seriously sear anything you might be thinking about putting on the picnic table, from peaches to perch. Using your average Costco propane grill you'd be lucky to get firmly into the high five hundreds.
Besides of its sheer power to sear food tightly, hardwood charcoal contributes flavor and character you can't really replicate with propane. Sure, you could soak the wood chips and put them into a foil tray and put them into the grill so it gets smoky...but if you're the type of person who likes a propane grill because it's a no fuss proposition, would you really go to all that trouble? It's far easier to fire up a true charcoal fire, and you'll be happier with the results.
Why Use Petroleum Near Something You Eat?
Most people object to charcoal because it conjures that square can and a stream of fumey, potentially explosive liquid marketed under the benign and helpful 'charcoal starter' description. Fi! There's a far better, faster, and cheaper way to get your charcoal going.
Smoking Like a Chimney
Chimneys are simply wide metal tubes with a heat-safe handle, and a grate positioned about a quarter of the way inside the bottom end of the tube. The idea is you light newspaper under the grate, and the coals resting above the grate get all fired up. Since all the energy is contained in this compact column, and since heat and flame like to climb, the process goes quickly.
Using this method, you can get coals hot in about ten minutes, and if you stuff the newspaper the right way, it only takes a single match. C'mon, that's just about as easy and fast as propane. Ok so you have to lug a bag of charcoal, but that tank of propane won't fit in your pocket, either.
Thursday, June 29
Tuesday, June 27
Sour Grapes Make Sweet Salads
Perfect for embalming a sprig of thyme, embracing a pool of extra virgin olive oil, but equally adept at removing even the toughest soap scum, vinegar is one of the most versatile—and one of the oldest—condiments. It delivers a sharp, bracing bite to the tongue and a heady, pungent aroma to the nose.
The same process that ruins wine (in French 'vin aigre' literally means 'sour wine') creates the prized sourness of vinegar. There's a long explanation about how, but in short, there's a family of acetobacter microbes that make their living by consuming alcohol (in the presence of air) and excreting acetic acid.
While this conversion process is a very bad thing for wine, and why so many of those gray rubber stoppers and white vacuum pumps make it to the kitchen tool drawer—it's a very good thing for salads. But acetic acid alone isn't enough to make vinegar delicious. Wonderful vinegars mainly come from wonderful pre-cursor products that have their own flavor profile, and that have been soured in a careful, controlled way, and then stopped just at the right point.
Balsamic, Cider, and White
The character of true balsamic vinegar from Modena, Italy, for example, starts with the boiled down, concentrated juice of Trebbiano, Lambrusco and other grape varieties, providing the sugar for fermentation. After inoculating the concentrate with a microbial stew by the maker, it takes years and years (we're talking up to 25) of additional fermentation in a progression of ever-smaller, wooden barrels of various kinds, each contributing unique character and flavor. The wood for these barrels can be exotic, and the progression is a highly guarded trade secret by the maker.
Apple cider vinegar, the current cash cow of predatory diet 'aid' shysters, benefits from the natural complexity of apples, one of whose components is malic acid. So what, you say? Malic acid is the fuel for another process called malolactic fermentation. This particularly yummy sort of 'going bad' changes the malic acid into milder lactic acid as well as producing, as a by product, the same chemical that's butters up the flavor of chardonnay, margarine, and 'I Can't Believe It's Not Butter'. Good apple cider vinegar, like balsamic, ages slowly, giving the vinegar time to undergo a whole series of reactions, including malolactic fermentation, that enrich and complexify the final product.
On the other end of the spectrum, white vinegar is literally just acetic acid and water. Some large commercial labs create acetic acid from, of all things, propane! Yes, the fuel you use to cook your chicken on in the back yard. While others ferment it from pure alcohol (who knows how they make that!...and while I'm in a parenthesis...note to self: Don't spend any money on 'organic' or 'brand name' white vinegar—it truly matters not!)
Chinese black vinegars made from toasted rice, millet and other grains can have as little as two percent of acetic acid, while red wine vinegars can have as much as seven percent or eight percent or even more. Most vinegars will tell you on the label, but as you can easily see, when you're buying vinegar, you're buying lots of other liquid: some of it delicious, some of it utterly without character.
What About Safeway?
In between the lush, teaming, complex true balsamic from Modena and the barren, stark and harsh white vinegar of Heinz, there lurks a shelf-load of concocted vinegars with leaves, sticks, fruit, coloring, and host of other gimmicks. Unless you explicitly buy vinegar made from apple cider, for example, you're likely just getting some acetic acid, caramel coloring, and maybe a few other additives--you can be sure, there's no malolactic fermentation happening there. So beware of what you buy. If you'll be eating the vinegar on a salad, check the label and weigh how much love went into the process. If no aging has taken place, for example, it's likely the vinegar lacks complexity which can be perfect for cooking, but maybe not naked from the bottle to adorn bread.
Monday, June 26
Full Court French Press
If you like good coffee and you've been using a drip machine, you're in for a treat. And unlike many other treats promised by the likes of Williams Sonoma, Sur La Table and other overheated purveyors of faddish food gadgets, this one won't force you into pilfering the swear jar or require that you build new countertops.
The Freedom Press, err, French Press
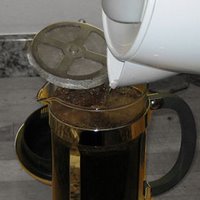
The french press, also known as a plunge or press pot, has been around since the turn of the twentieth century. The idea is simple: you put large-grained coffee grounds into a cylinder, add water at around 185 degrees (just off the boil, as they say), wait a few minutes, then plunge the waterlogged grounds to the bottom and pour off the black gold.
It's simple. It's beautiful. It's fun. Your guests will ooh and ahh when you bring it to the table. But it's also super easy to make a lousy pot. Here's how to get the most from your french press.
First, make sure the coffee grinds are coarse. They should be little coffee nuggets, not powder or grains. Coarse salt comes to mind as a reasonable comparison, but then again, coarse salt varies quite a bit, too. I guess you'd have to say the grinds should be larger than drip grind, perhaps even double. To get a good idea, ask for a quarter of a pound ground on #12 at Peet's. You could try Starbucks, too, but good luck finding someone who will know what you're talking about.
And this brings me to the crux of the french press, and for that matter, all coffee preparation methods: get your coffee ground at your local coffee shop daily (ground beans only retain peak flavor for about 48 hours), or if that's not in the cards, invest in a conical burr grinder and buy whole beans to get good results.
The Daily Grind
But what, you say, about that whizzy, small grinder thing I put on my registry at Crate and Barrel? The truth is that those spinning blade grinders are great for making powder from whole spices, they're OK for grinding beans for drip coffee or any method that involves a paper filter, but they're lousy for the french press. French presses use a metal mesh filter that won't remove the tiny, powdery grinds made from the blade grinder. You end up with a cloudy, bitter, not so nice cup.
Really fast spinning blades smash the beans into ever smaller bits and chunks, and worse, they do it unevenly. That's why there's always coffee powder stuck to the bowl of the grinder and lots of oils from the beans transfer to the blades and grinder bowl. The result is chunky coffee bits of all sizes somewhat robbed of their precious aromatic oils. Worse, unless you're assiduous about cleaning your grinder, you'll eventually have rancid coffee oils accumulating that can spoil successive pots.
Burr grinders, by contrast, literally flatten, shatter, and crush the beans as they pass through the grinder. The genius of the conical burr grinder is that the metal parts that do the grinding are positioned one inside the other a small but fixed distance from each other. The resulting coffee grinds are crushed shards of more uniform size that have more surface area. When these jagged shards get into the hot water, there's more oils and aromas on their surface to pass from the bean into your cup of joe.
So, if you drink coffee every day, buy yourself a burr grinder. You'll use it forever, and you can get a decent one for around $100. Not a bad investment in your daily happiness. Just for comparison, that's only one session with your shrink, or about half a pair of fabulous new jeans.
The Actual Making of the Coffee
Back to making coffee with a french press...after you grind your beans with your burr grinder, spoon out about two tablespoons per 8 ounce (normal mug size) cup into your pot. Sounds like a lot of coffee, right? It is, but the results are worth it. Remember the grinds are larger, so there's more airspace between each particle, so it looks a bit like more than it really is. Be good about measuring both the grinds and the water the first couple of times until you get the right eyeballs from it. The big mistake most people make is to use too few grinds and/or too much water.
Next (or concurrently with grinding the beans) boil some water, take it off the heat, and wait a little bit until it cools a few degrees to around 185. Pour the water gently over the grinds in the pot to cover them, swish the pot a little to get all the grinds wet, and then fill it up to the top with water. Place the plunger assembly on top of the pot with the plunging handle all the way up. Wait about three and a half minutes, plunge by pressing down slowly and steadily on the handle, pour, and enjoy.
The only twist to this method that's worth mentioning is that some people use a wooden spoon to stir the grounds around about halfway through the brew. The idea is to circulate some water to make sure all the grinds are steeping evenly and thoroughly. I just plunge up and down an inch or two in the pot and return the handle to the 'up' position, sort of like a washing machine agitator. That methods works well, too. If your beans are fresh, you'll notice a significant 'bloom' of bubbles. This bloom is just CO2 escaping from the beans. C02 is one of the by-products of roasting, and the fresher the beans, the more CO2 will bloom when you brew.
This page has very complete instructions with photos. The recommendations the author makes for burr grinders, however, are out of date. The models he suggests are no longer available, but just poke around a bit and you'll find good ones. Sweet Maria's has many for sale, although they tend to be on the more serious side. You can find cheaper ones if you look around.
Don't forget, used coffee grinds are compostable.
Higher end grinders brought to my attention by my Tab addict friend, Chris.
Mazzer
Versalab M3
Saturday, June 24
Cane-Enabled Cocktails
The world owes a lot to the reedy, sub-tropical sugar cane plant: hyperactive children, a long history of imperialist plantations, bizarre federal price-fixing laws...a sticky history indeed. But few by-products of this cousin of the lowly lawn grass plant, which by the way can grow as high as 12 feet, are as truly rewarding as their distilled ones: cachaca and rum.
While both liquors come from sugar cane, cachaca is made from fermented and distilled sugar cane juice. Rum, at least ideally, is made from fermented and distilled molasses. Molasses is a by-product of sugar manufacturing that results from cycles of boiling and purifying raw cane juice until it's fit for the queen's 4 o'clock tea service.
Like some high quality wines, high quality, small-batch cachacas and rums are aged in wood barrels. And also like wine, there are industrial, high-volume cachacas and rums that make up in availability and affordability what they lack in depth. Cachaca is one of top four produced liquors of the world after the likes of vodka, rum, and soju.
Now that you've got your muddling game on (see previous posting on muddling), you're all set to make on the best, most classic cachaca cocktail known to man, the Brazilian staple, the caipirinha (pronounced ki-per-een-ya).
Best Caipirinha Recipe
For this recipe, you'll need a serving tumbler, a stainless bar shaker, and a muddler.
1.5-2 ounces cachaca
1 large juicy lime (1.5 small ones)
1 tbs white or demerara sugar
ice cubes
Halve the lime. Slice each half into quarters and place them in a tumbler along with the sugar. Muddle! This will require some solid muddling skills, as you're also juicing the lime along with releasing essential oils from the peel. If you want to do it another way (more like the mojito way) you can juice each half of the lime first into the tumbler, then slice up the rinds and throw them in and muddle with the sugar. Next add ice to the top of the tumbler, cachaca, and shake in the stainless cup. Serve it forth!
Wednesday, June 21
Join the Great Muddle Class
You may not have affordable healthcare or be able to depend on social security, but you can still join the great muddle class. Muddling is an ignored cocktail foundation technique that makes the Mojito and Caipirinha come alive with essence...of lime, of mint, of lemon. The Old Fashioned cocktail also gets muddled if you're a traditionalist, although since it takes some time to do, most barkeeps skip it. And that skipping has turned into it's own law of style, attracting non-muddling groupies who like the fruit of the Old Fashioned unmolested.
Muddle Through It
Muddling is the gentle but thorough bruising of fruit (or mint) with sugar at the bottom of a cocktail shaker or glass to release juice and essential oils. Once muddled and the glass is replete with this heightened essence, you add alcohol, soda water, ice, and whatever else you need to complete the cocktail. If drunk within the first few minutes after muddling, the happy imbiber gets the full force of the flavors (to wit: the better the fruit or herb, the better the flavor.) The wonderful thing about muddling is that you release the flavor you want without breaking the fruit rinds or mint leaves into tiny, annoying bits that can float around creating both aesthetic and gastronomic unpleasantness.
Here's How to Get the Best Flavor
Muddled drinks at home have the potential to be much better than those made at most bars and restaurants. In commercial bars, they use sour mix or simple syrup (equal parts sugar and water heated gently until the sugar completely dissolves) to sweeten drinks, eliminating worry over dissolution of sugar and speeding up the mixing process. Bars are, naturally, more about speed and volume than about mixing with love. While this adds to the efficiency of the drink-making process, it also eliminates an opportunity for better flavor.
At home, where we rarely take the time to make simple syrup, granulated sugar can be added to the glass along with the fruit before muddling. The sugar, with all of its sweet, pointy crystals, acts as an abrasive medium that increases the efficiency of the muddle. For each press of the muddler (or spatula handle, as the case may be) more of the surface of the fruit rind or mint leaf can be affected and more flavor is released. Take home thought: before you muddle, add the granulated sugar.
How to Muddle
If you're thinking about crushing, piercing, smooshing, or pounding...forget that. The process of muddling is to bruise and press. You want to release essential oils and fruit juice, but not make a mash of the ingredients. Press firmly but slowly and in a controlled fashion that adds all the pressure you want, but doesn't break down the ingredients into mush or bits.
There are all kinds of tools you can use to muddle, but here are a few important characteristics:
Best Mojito Recipe
For this recipe, you'll need a pint-sized bar glass, a stainless bartender's cup, and a muddler.
Ingredients:
1 Lime, halved
Five or six fresh, lush, large mint leaves
2 or 3 Cubes of Demerara sugar to taste (it's a sugar with 2% molasses that comes in handy cubes)
1.5 ounces of rum, preferably a silver rum (colorless) of decent quality
Ice
Soda water
Juice the lime halves into the pint glass and add the remaining rinds. Add the sugar cubes and mint leaves, and muddle. The sugar cubes need to be mostly crushed and will partially dissolve in the lime juice. The mint leaves should be darkened by being bruised but not in pieces. Next add ice, rum, and a splash of soda water on the top. Place the stainless cocktail shaker over the pint glass and turn it over once or twice gently (don't vigorously shake). Separate the glass from the stainless cup, leaving the cocktail in the stainless cup. Pour it all into serving tumbler and garnish with a mint leaf. The undissolved sugar will settle to the bottom, and that's ok. It adds to the rustic charm, and the lucky drinker can choose to mix more in or let it alone to suit their taste.
Muddle Through It
Muddling is the gentle but thorough bruising of fruit (or mint) with sugar at the bottom of a cocktail shaker or glass to release juice and essential oils. Once muddled and the glass is replete with this heightened essence, you add alcohol, soda water, ice, and whatever else you need to complete the cocktail. If drunk within the first few minutes after muddling, the happy imbiber gets the full force of the flavors (to wit: the better the fruit or herb, the better the flavor.) The wonderful thing about muddling is that you release the flavor you want without breaking the fruit rinds or mint leaves into tiny, annoying bits that can float around creating both aesthetic and gastronomic unpleasantness.
Here's How to Get the Best Flavor
Muddled drinks at home have the potential to be much better than those made at most bars and restaurants. In commercial bars, they use sour mix or simple syrup (equal parts sugar and water heated gently until the sugar completely dissolves) to sweeten drinks, eliminating worry over dissolution of sugar and speeding up the mixing process. Bars are, naturally, more about speed and volume than about mixing with love. While this adds to the efficiency of the drink-making process, it also eliminates an opportunity for better flavor.
At home, where we rarely take the time to make simple syrup, granulated sugar can be added to the glass along with the fruit before muddling. The sugar, with all of its sweet, pointy crystals, acts as an abrasive medium that increases the efficiency of the muddle. For each press of the muddler (or spatula handle, as the case may be) more of the surface of the fruit rind or mint leaf can be affected and more flavor is released. Take home thought: before you muddle, add the granulated sugar.
How to Muddle
If you're thinking about crushing, piercing, smooshing, or pounding...forget that. The process of muddling is to bruise and press. You want to release essential oils and fruit juice, but not make a mash of the ingredients. Press firmly but slowly and in a controlled fashion that adds all the pressure you want, but doesn't break down the ingredients into mush or bits.
There are all kinds of tools you can use to muddle, but here are a few important characteristics:
- The muddler should have a flat end rather than a round or pointed end...this lets you get more of the surface of the muddler in contact with the fruit or mint.
- The muddler should not be made of any reactive material like aluminum or a plastic that could transfer flavors. Wood is a good choice as long as it's easily cleaned.
- The muddler should fit nicely in your hand and be easy to handle.
- The muddler should be long enough to easily get to the bottom of whatever glass or cocktail shaker you'll be using to muddle in.
Best Mojito Recipe
For this recipe, you'll need a pint-sized bar glass, a stainless bartender's cup, and a muddler.
Ingredients:
1 Lime, halved
Five or six fresh, lush, large mint leaves
2 or 3 Cubes of Demerara sugar to taste (it's a sugar with 2% molasses that comes in handy cubes)
1.5 ounces of rum, preferably a silver rum (colorless) of decent quality
Ice
Soda water
Juice the lime halves into the pint glass and add the remaining rinds. Add the sugar cubes and mint leaves, and muddle. The sugar cubes need to be mostly crushed and will partially dissolve in the lime juice. The mint leaves should be darkened by being bruised but not in pieces. Next add ice, rum, and a splash of soda water on the top. Place the stainless cocktail shaker over the pint glass and turn it over once or twice gently (don't vigorously shake). Separate the glass from the stainless cup, leaving the cocktail in the stainless cup. Pour it all into serving tumbler and garnish with a mint leaf. The undissolved sugar will settle to the bottom, and that's ok. It adds to the rustic charm, and the lucky drinker can choose to mix more in or let it alone to suit their taste.
Friday, June 16
Roast Some Coffee
I think we've all had enough of Starbucks for now...support the little guy or make your own beans.
Are You Interested In Roasting at Home?
For the brave and curious, roasting at home is definitely feasible. It sort of begs the question, 'Why bother?' in the same way that sewing your own clothes does, but there are home sewers, too. And even though I don't rank myself among the particularly brave when it comes to craft projects, I have tried home roasting.
Check out Sweet Maria's. They've got a huge supply of equipment, information, and reasonably-priced green beans.
I have a home roasting machine from Swissmar called the Bravi. It's a fairly automated machine...you literally load up 8 ounces of green beans, select a roast level and then push the green button. With good quality green beans and several trial-and-error batches, you can turn out a decent finished product.
Careful control over time, temperature, and agitation is key to successful roasting. Guerrilla roasters use hot-air popcorn machines with a hole drilled in the top to insert a thermometer. Some put a single layer of beans on a cookie sheet and put it in a hot oven, or use one of those stovetop popcorn makers that you crank. You don't really need a machine like the Bravi to achieve a solid home roast, but it definitely helps. There are smaller, less expensive machines to be had as well.
The key thing in any roasting of beans, whether it's at home or at a factory, is to keep the beans from contacting direct heat for too long and burning. Keeping everything moving and controlling temperature is well left to a mechanism especially designed for the task, in my opinion. Home roasters generally heat things to the 525-600 degree F range. Commercial roasters, by contrast, start at around 600 F and can get as hot as 1000 F.
What Happens in the Home Roaster
What comes out first is smoke...and lots of it...and it keeps on coming for about 15 minutes. Mainly it's chaff that's burning off, the papery skin that encases green beans. The smoke that's produced by the roaster is very herbaceous and acrid at first, then it becomes woodier and more aromatic as the beans dry out and the fats and carbohydrates in the green beans undergo transformation into the aromatic oils we all love (and crave in the morning) so much.
Roasting near a window, having a powerful outside-vented hood turned all the way up, or doing it outside is key. The level of oil in the beans means that the smoke will stick to your walls for a while, set off smoke detectors, and drive your roommate or spouse nuts...you can smell it for days.
Once the beans have been roasted to the level you want (which you have to determine through trial and error for the most part) they will need to cool and de-gas CO2 for at least 6 hours. Many people believe that waiting up to a day helps the flavor to develop fully. I've found over-night to be plenty, and since coffee flavors dissipate so fast, sooner is better than later to try a pot. Once the beans have rested, sock them away in an airtight container to minimize the loss of the aromatic oils you just worked so hard to create.
Just Want to Enjoy Something Amazing?
Here are a very few places I've been that stand out...
Blue Bottle Coffee Company in Oakland, California is a micro-roaster that's taking back coffee from the likes of Starbucks. They've got a stand in Hayes Valley in San Francisco where they serve coffee and espresso drinks, and they also have a cart the farmer's market at San Francisco's Ferry Building. They ship!
Barefoot Coffee Roasters in Santa Clara, CA are committed to coffee culture...like crazy...with a fair trade / organic let's do the right thing twist. Gorgeous capuccinos with amazing leaf-patterned crema and foam. Fabulous quality. They also sell roasted beans to the trade.
Spot Coffee is a phenom in Buffalo, New York and the surrounding area. They've got great quality beans and they also retail the home version of quality equipment. You've got to hang out in the Elmwood or Delaware locations to get the full vibe...it's young mixed with Buffalo yuppie professionals. Some queer, some college, some laptops.
Intelligentsia Coffee is the place to check out in Chicago. They've got a few locations, including Millenium Park. In addition to some of the most professionally prepared espresso drinks and lovingly roasted beans anywhere, Intelligentsia has a great website with lots of great information about where coffee comes from and how it's processed.
Saturday, June 10
Californian vs. French Wine-Making Smackdown. Part 2
A poison control expert once remarked that the danger is in the dose, not in the substance. The same holds true for the earthier flavors in wine caused by microbiological growth (other than the yeast that ferments the sugar into alcohol).
For example, wine expert and author of The Wine Bible (aka, The Wine Tome), Karen MacNeil, talks about 'cat piss' flavors in Sauvignon Blanc as a positive characteristic...so long as its not too much of a good thing. At the right levels, microbiological leavings can add to the complexity of wine. When they're too high? Blech.
I think it's safe to say that (in general) the French like earthy smells and flavors more than Americans do. Think about the whole 'French people never take a shower' thing that some people like to complain about. Think about where truffles come from. Remember, it was the French who thought of using a pig to find a fungus and then put it on the table. Think about the fact that the French smoke everywhere. And what about their cheese? French cheese can be extremely stinky, and they love that.
If you need more proof of this concept, note that the cultish marketing guru, Clotaire Rapaille, made this insightful if melodramatic (paraphrased) statement on a PBS Frontline installment called The Persuaders, "In France, the cheese is alive. You never put the cheese in the refrigerator because you don't put your cat in the refrigerator….in America I can tell you, the cheese is dead everywhere…'This cheese is safe, is pasteurized, is wrapped up in plastic…You can put it in the fridge.' I know the fridge is the morgue. That's where you put the dead bodies, eh?"
Eh, indeed. In America, we like our food to be clean (and perhaps a bit more dead). In France, they like it teaming with life: we invented hamburgers, they invented Steak Tartare.
Our taste in wine follows a similar train of thought: we favor clean flavors that come from squeaky clean presses. Modern presses and tanks in Californa are made of stainless steel and housed in concrete buildings with epoxy resin floors and wide drains perfect for hosing down with a solution of TSP (tri-sodium phosphate). They're designed from top to bottom to stop the spread of bacteria and mold from one batch to the next. In France, the presses are fequently smaller, older, maybe made with wood components, and may not even receive a rinse between batches.
One result of this difference in approach is more of the musty and fusty in the wine. Or is it simply more delicious complexity? You decide.
Tuesday, June 6
Earliest Vintage?
Making wine is a very old practice, and it didn't start in Europe. A 7000 year-old jar found in Hajji Firuz Tepe, a Neolithic village in Iran's northern Zagros Mountains, was discovered bearing trace resins strongly suggesting wine.
Grapes for these super-early vintages might have been harvested from some of the first organized, domesticated crops—farming distinguishes the Neolithic period more than a specific period of time.
Sunday, June 4
Californian vs. French Wine-Making Smackdown. Part 1
California wines and traditionally made French wines are often easy to distinguish when sampled side by side. A Canadian francophone (and –phile) friend of mine once remarked, after helping to polish off a Napa cabernet over dinner, that California wines 'all taste the same'. His beef with our wines, he said, is that they are overpowering with both alcohol and blatant, fruit-forward characteristics. Although he was mostly joking, his sour grapes about American wine-making speaks to, among other issues, a basic difference in approach between the Old and New World.
Here are a few obvious differences: California wines are by and large consumed immediately after purchase, not cellared and allowed to age. In California the brand is key. In France, it’s the place the wine was made (Burgundy, Bordeaux, Cru, Grand Cru). Ultimately, my opinionated friend argued, this difference in approach makes American wines less interesting because they are so completely accessible: they don’t challenge you to explore the nuances, they just deliver the big flavor under a big, brassy label. Pow!
French wine, by contrast, is in general more subtle and cerebral in its play of flavors and expression of the concept of gout de terroir—literally meaning ‘taste of soil’, the idea that the dirt of a particular vineyard expresses itself through the grapes grown in it. The enjoyment of the wine, therefore, is as much of an intellectual experience as a sensual one. Far from being an ascetic who doesn’t know how to enjoy big flavors, my friend instead would say that this complexity increases the pleasure of the experience of enjoying wine—it literally goes to your head as well as your palette.
My friend’s broad generalizations are just that…of course California wines can be just as nuanced as any French wine. And nuance doesn’t necessarily equal quality. But the notion that California and French makers (at least traditionally) produce consistently different styles of product continues to be true, even in the face of globalization and the high-price, homogenizing consultants it brings. Some of the differences may be properly ascribed to a difference in aesthetic preferences, soil, and conditions, some of it also has to do with wine-making techniques.
Stay tuned for that discussion...
Subscribe to:
Posts (Atom)